Run a Bot
This page explains how to run a workflow when the user has one available on his platform. The tutorial is based on a knapsack problem application in order to provide more specific examples for the user.
1. Identify your workflow and its options
Once a workflow has been loaded or created (trough the workflow builder) by a user or a platform provider, it’s available on the main page of the Workflows.
In the following picture, the *Workflow Knapsack Problem* has been shared by a
team member in the specific Workspace *Base_de_donnees_Formateurs*.
Thus, the workflow is available both in this section and in the Overview of all my bots section.
This last section shows all the workflows available to the user on every Workspace to
which he have access, including those created by him and not shared with
a specific Workspace.
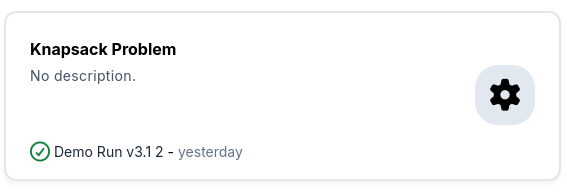
Global information is also visible on the workflow identification card, such as its name, a brief description of its purpose (when provided by the user or the developer), and the last task that was launched with this workflow.
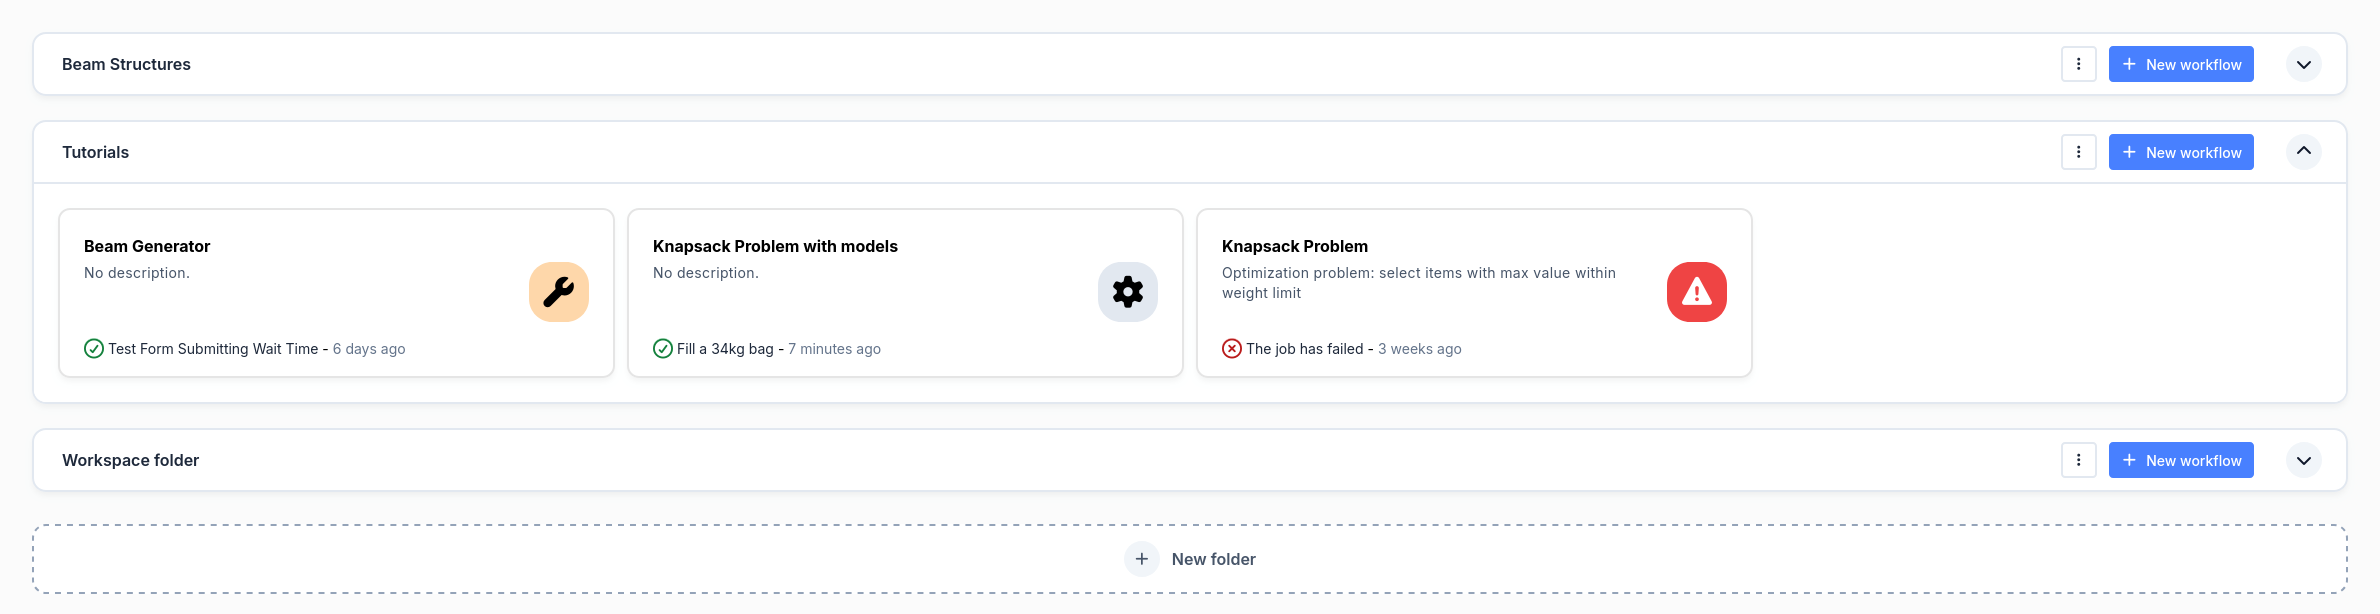
Several options are available when the workflow has been identified on the Workflows page. According to the following picture, four main options provide access to several functionalities:
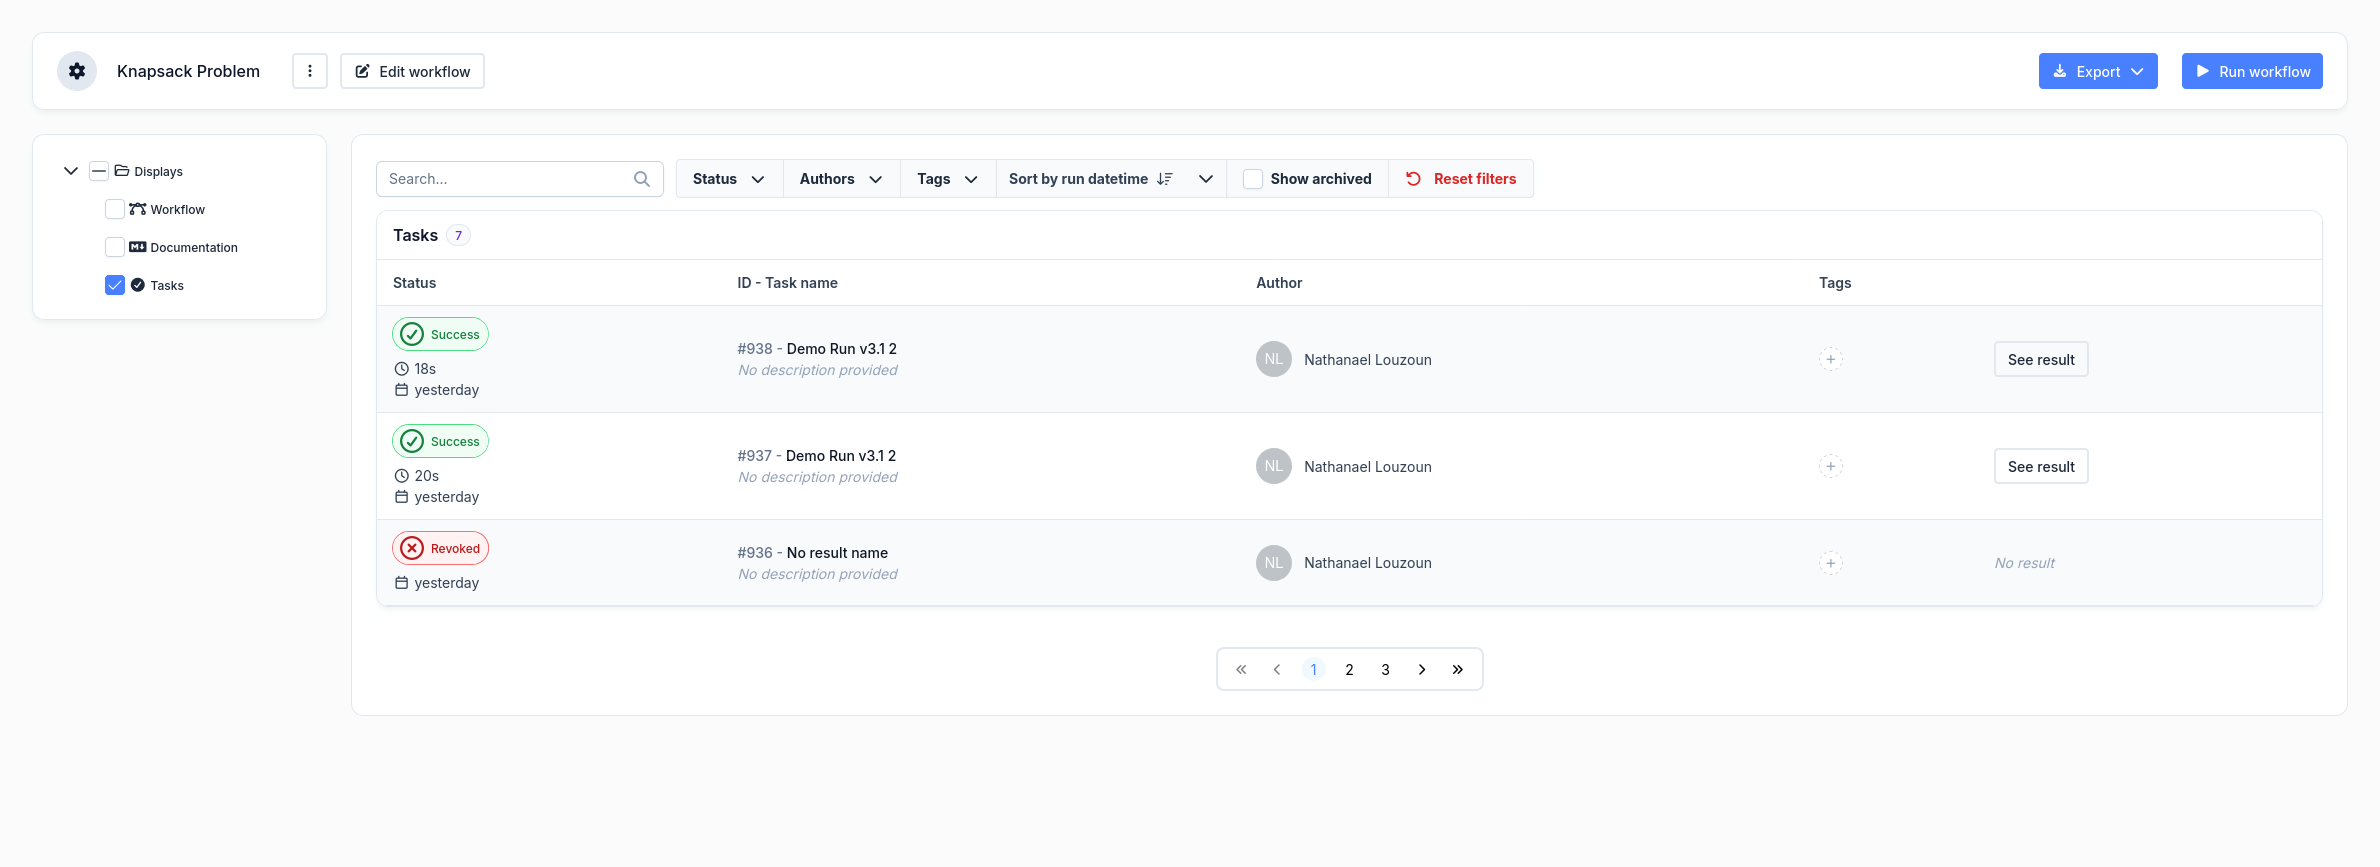
Click on the workflow's name or description: browse to the workflow's details page. You can run, edit, share, delete or export the workflow. Additionally, you can change its description, name or documentation. A summary of the last tasks launched by the user with this workflow is also provided.
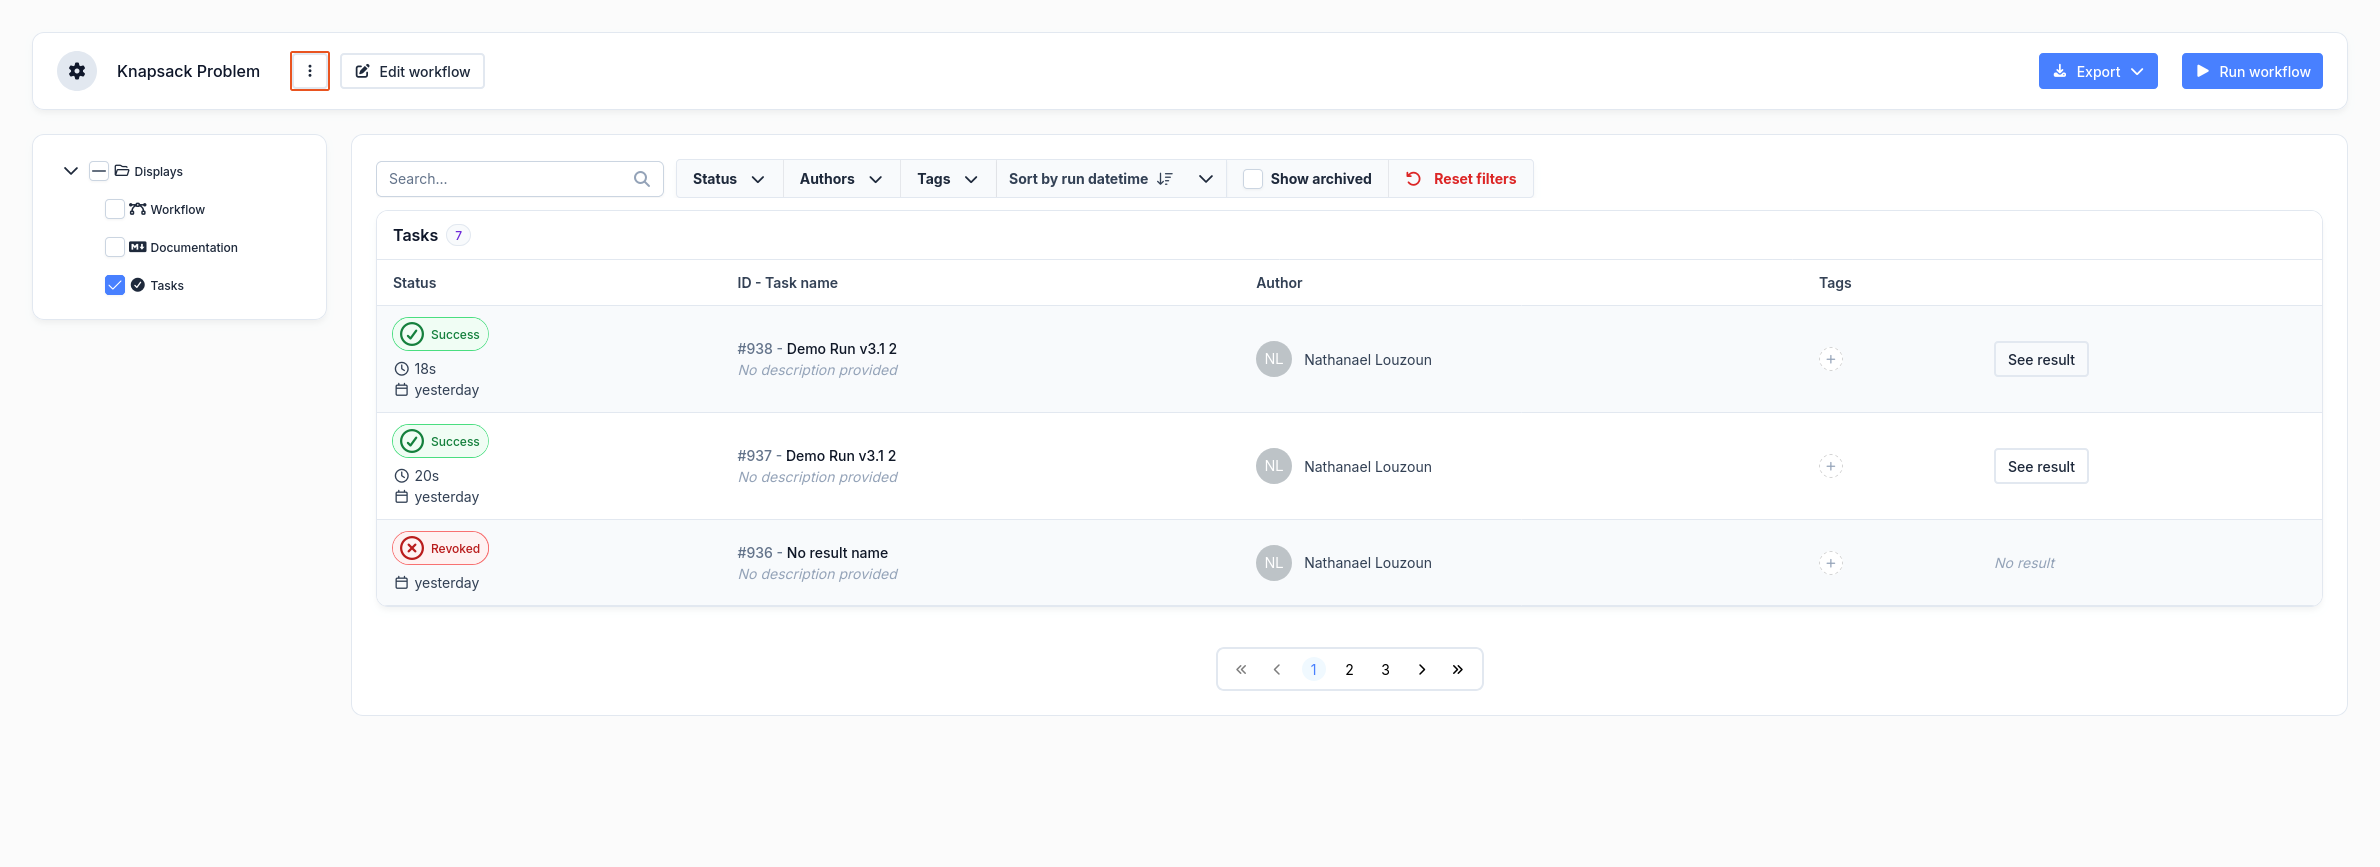
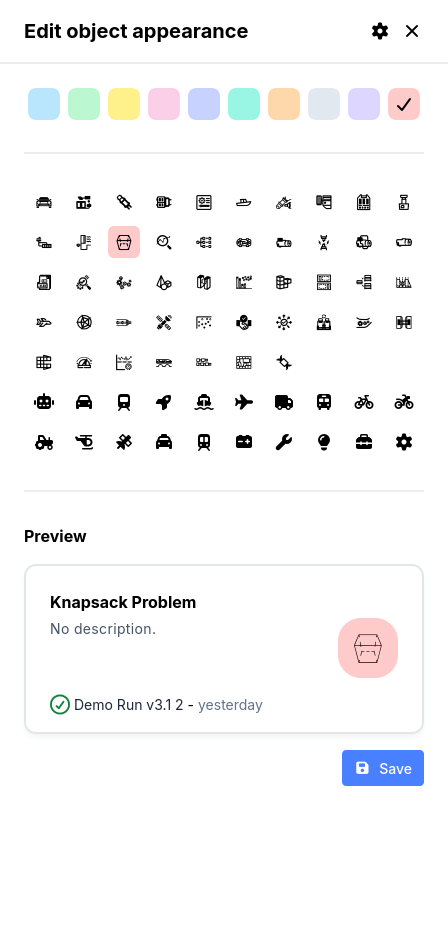
Clicking the kebab menu icon (3 vertical dots) as shown below, you can edit the style of the workflow
Run your workflow from the corresponding button on the details page.
From the bot card, ot the tasks section of the workflow details page, click on the result name, to open the results page.
2. Provide input values to your workflow
In order to launch the workflow, several input values are required for calculation and are requested from the user on the form page (see the picture of the third item of 2. Identify your workflow and its options).
For this specific Knapsack Problem application, input values are separated into four main categories. As a reminder, the Knapsack problem consists of a knapsack that can contain up to a certain mass of items. Several items are available in a store, and each one has both a mass and a price. The challenge is to find the best solution that consists of the highest summed price of items that can fit into the knapsack for the maximum mass.
Thus, the necessary input values are defined as:
- A list of items with a mass and a price defined for each one of them
- A knapsack with its specific maximum mass capacity
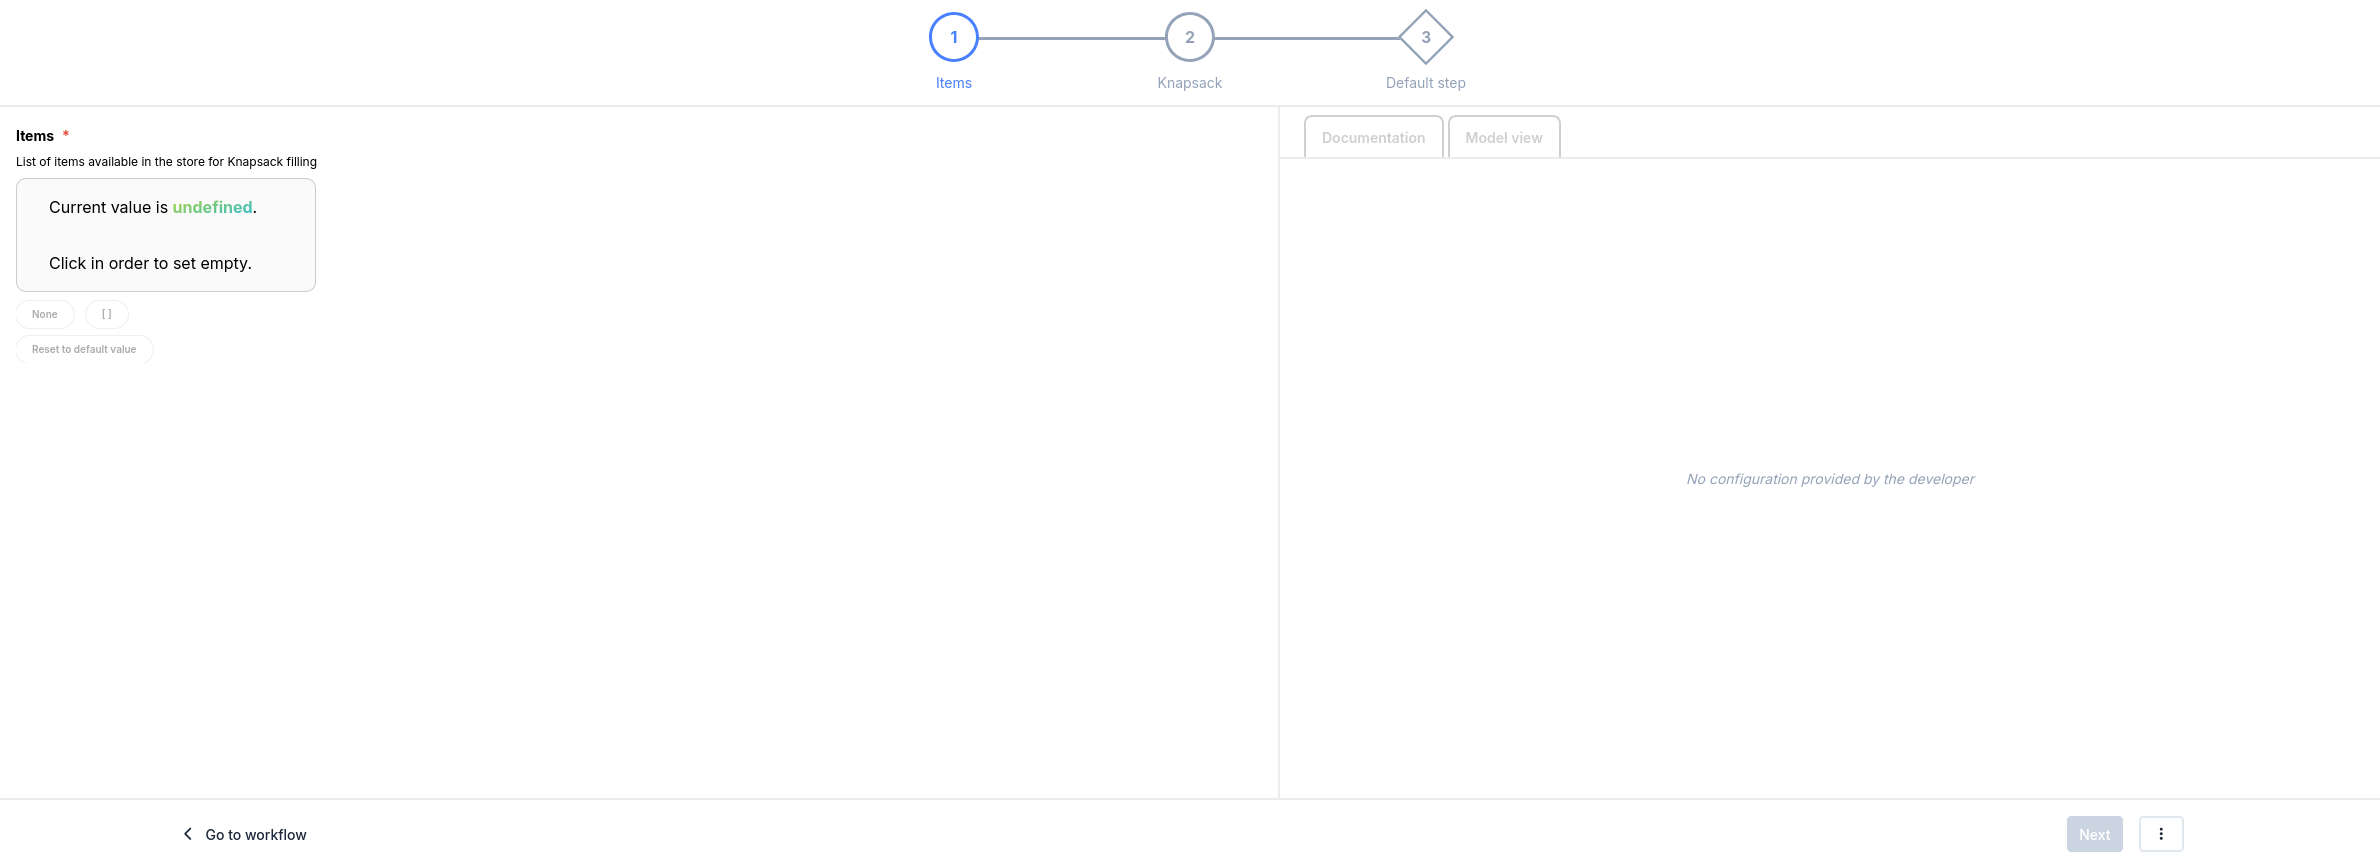
In the form, these input values are presented in the first two main categories, “Items” and “Knapsack”.
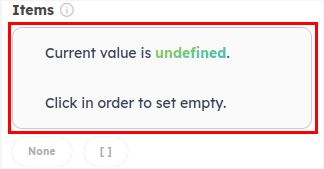
The value of “Items” and “Knapsack” before creating or loading any object is undefined. You have to click on the box bellow the input name to assign an empty list (Items) or an empty object (Knapsack).
a. Create a new item
A new item can be created by clicking on “+ Create” in the “Items” category.

Specific values can then be provided by the user for the mass and price. A name may also be added to identify this item in the database more easily. When both attributes are provided by the user, data can be saved using the ”Save as New” icon on the field's right-hand side.
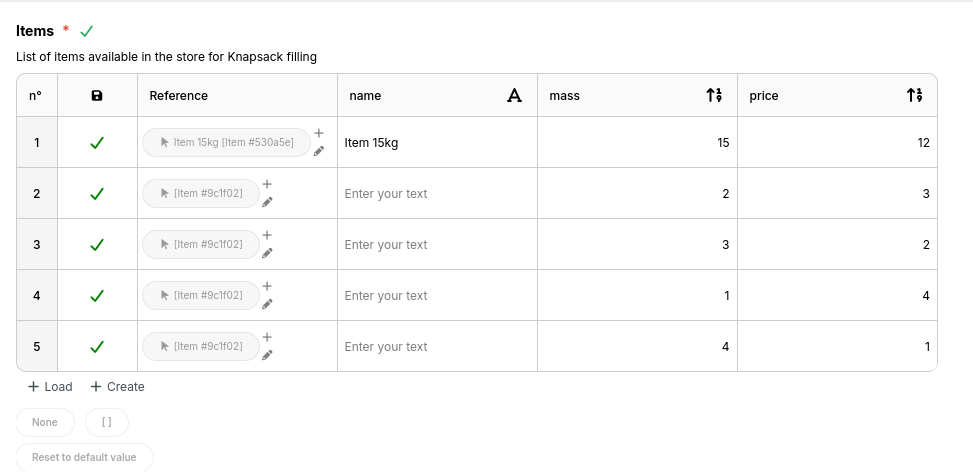
The new item is created, added to the problem items, and will be used in the calculations.

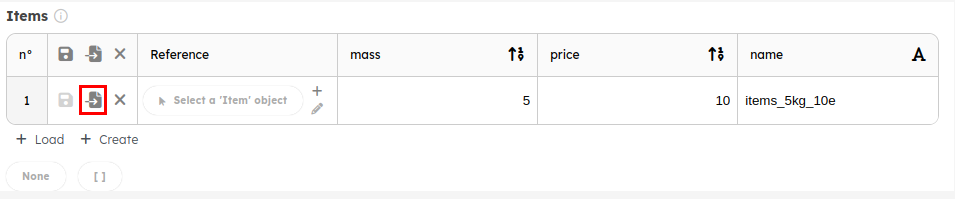
b. Load pre-created items
If several items have already been created by the user or shared through a workspace by other team members, they are also available for form filling. A created or provided item can be added to the problem items by clicking on “+ Load” in the “Items” category.

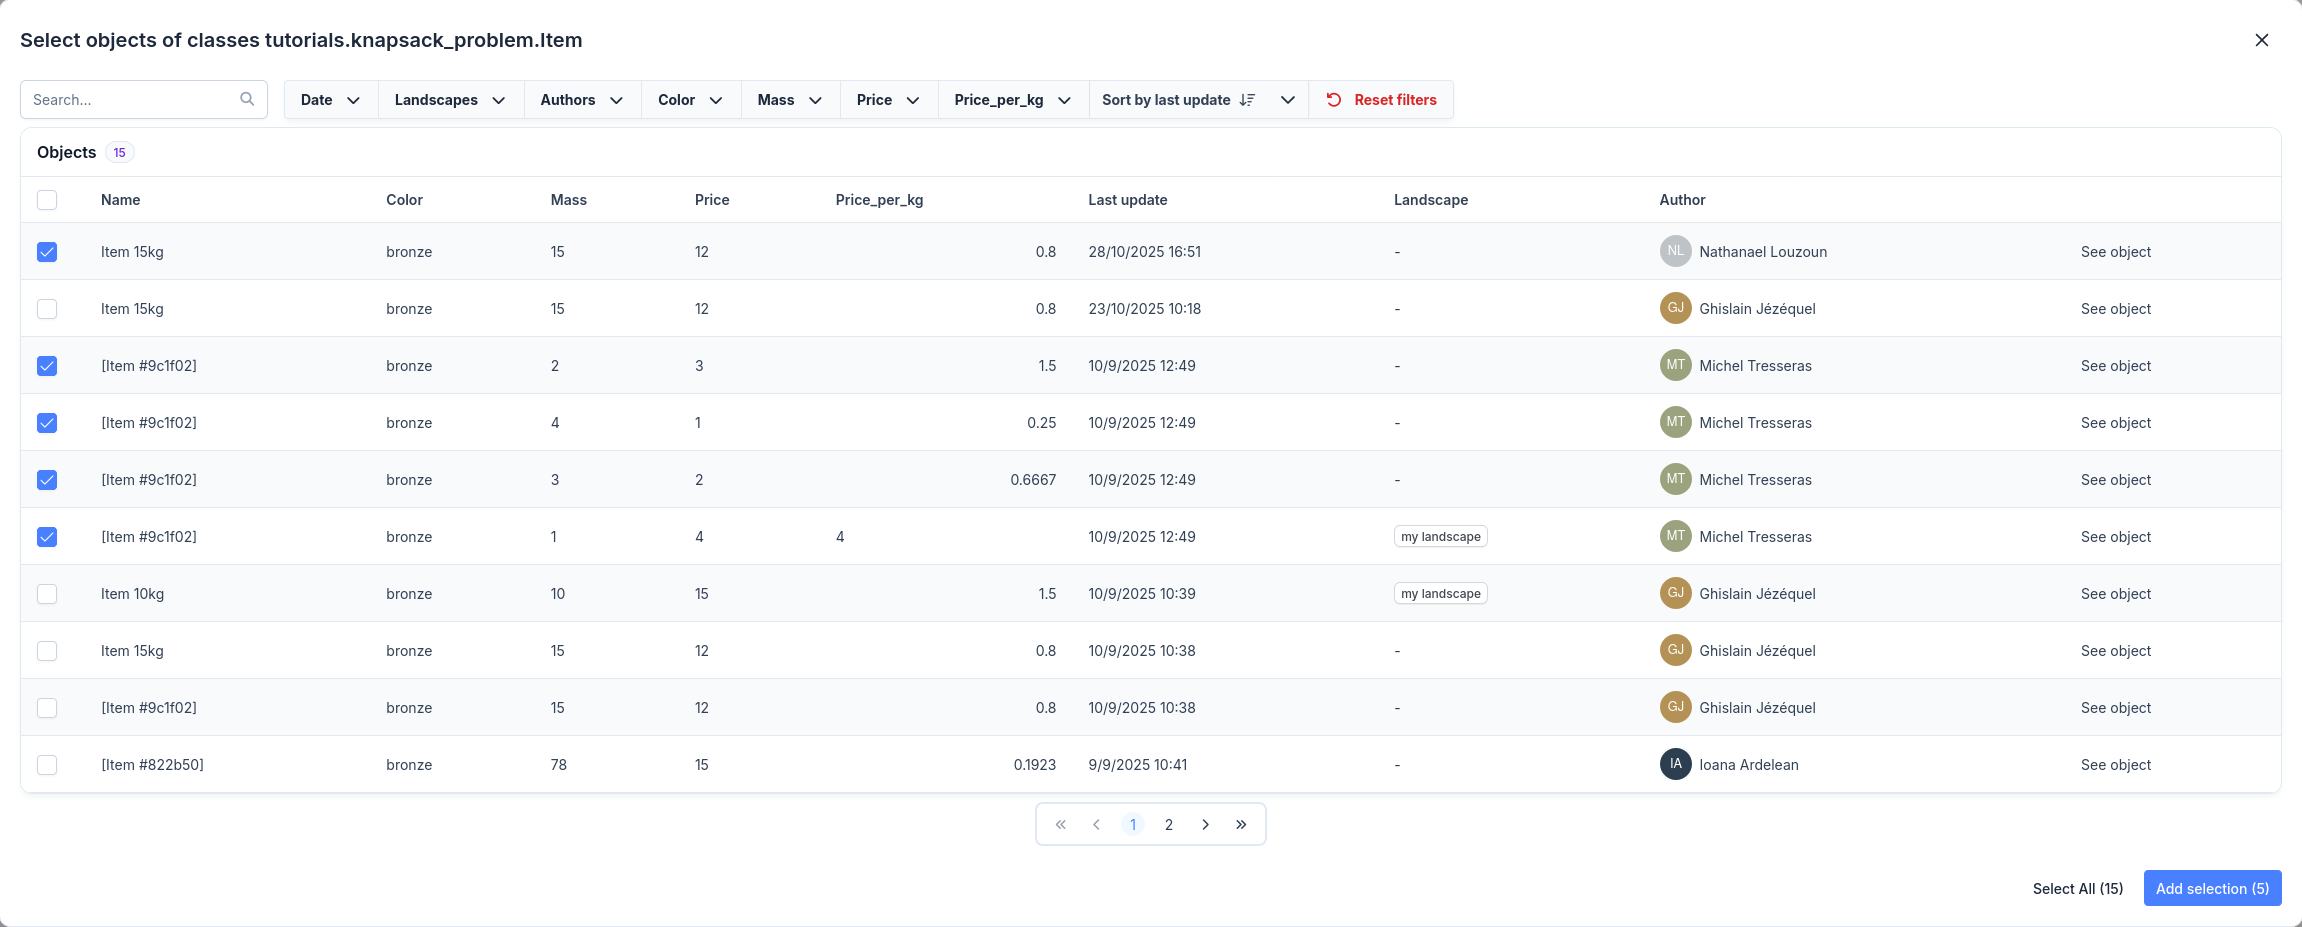
A new page opens for the user to select the desired items.
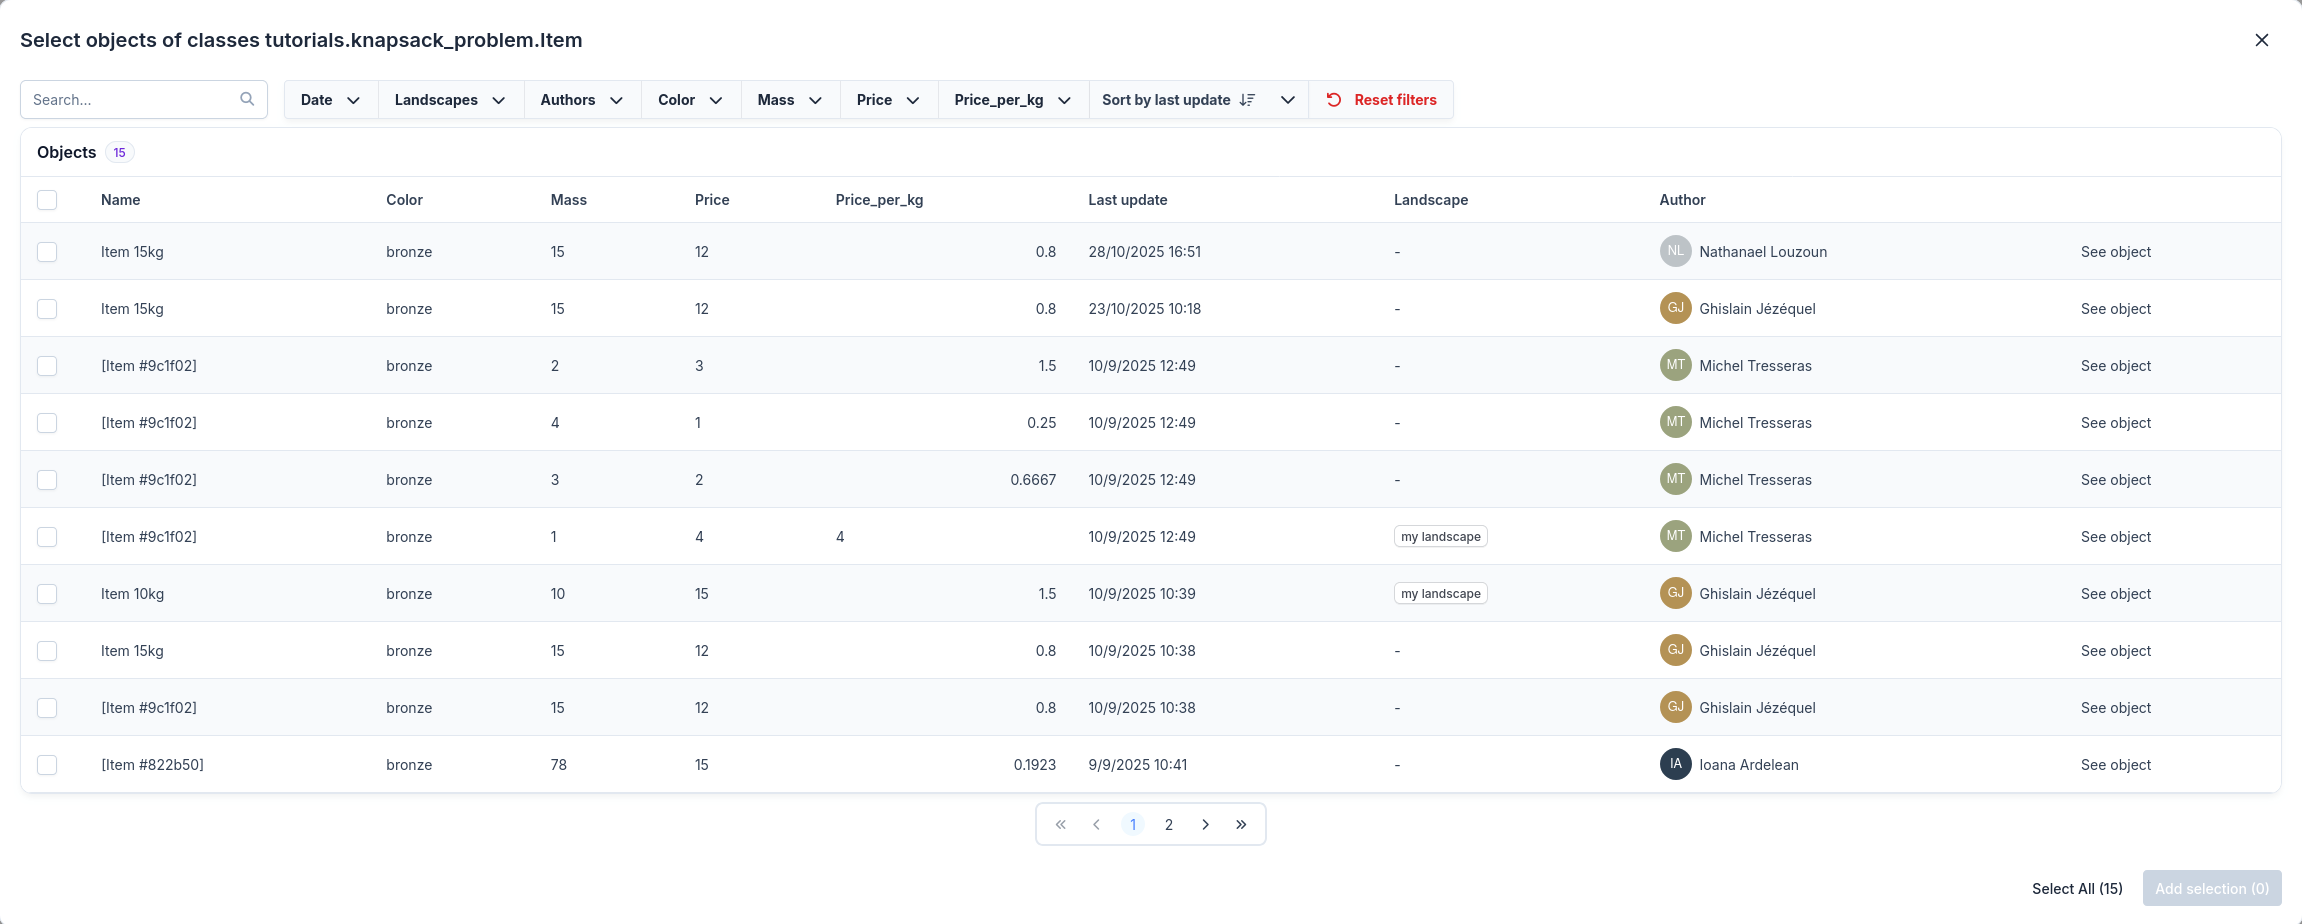
By clicking on several items and validating on the “Select” button, items are directly added to the problem items with their own mass, price, and name attributes. Alternatively, you can select all the items by clicking on the “Select All” button.
c. Enter the last required input values
Advance through your form wizard by clicking the Next button.

The other required input values are filled in the same way:
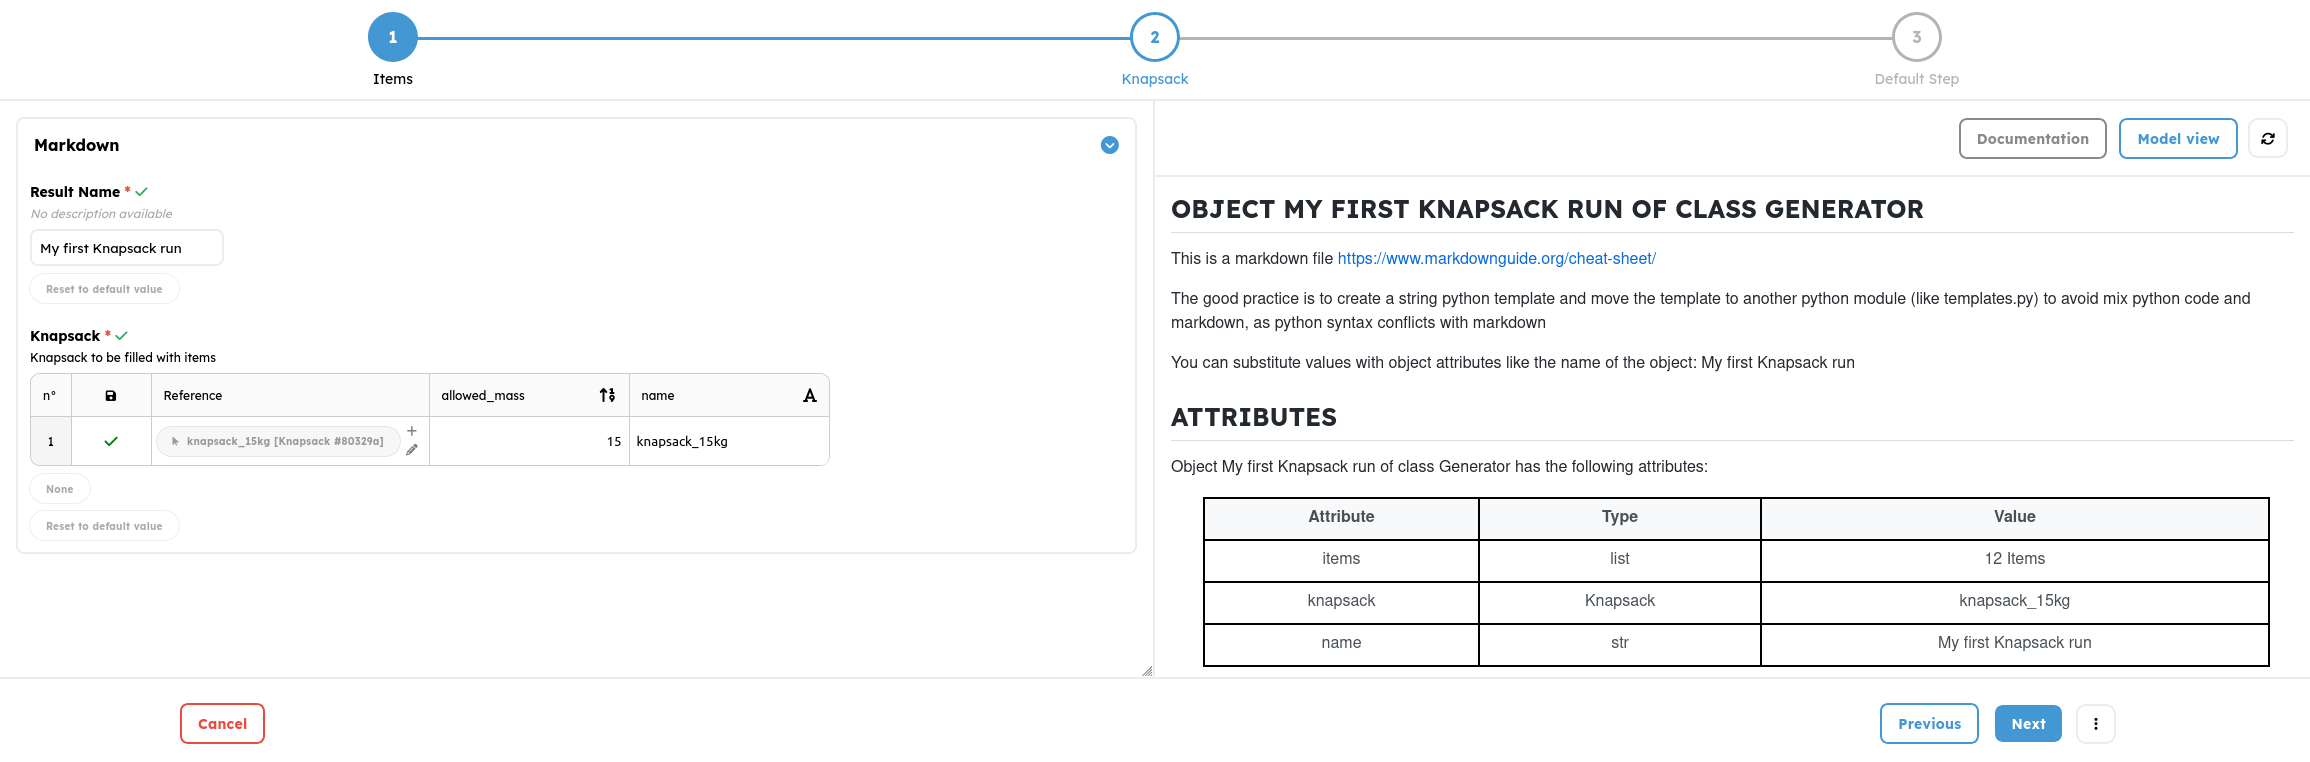
- Create a knapsack with its own allowed_mass and name characteristics.
Assign a name to the entire simulation to easily identify and find it later.
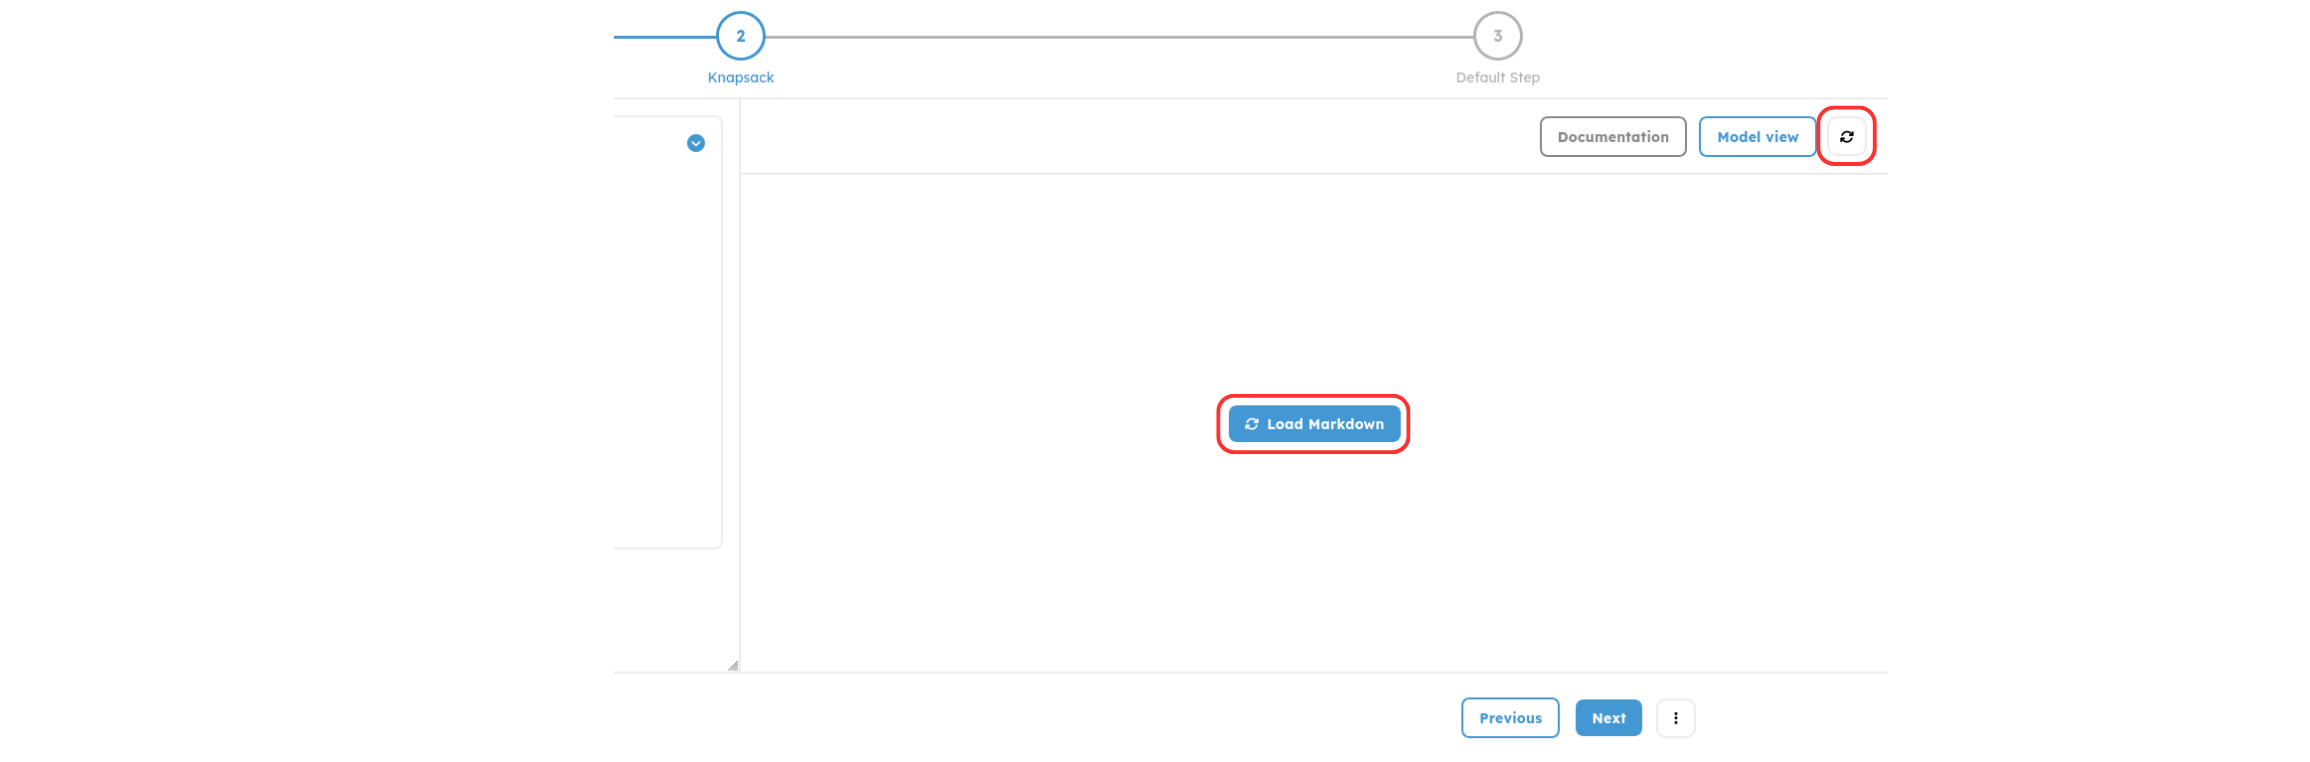
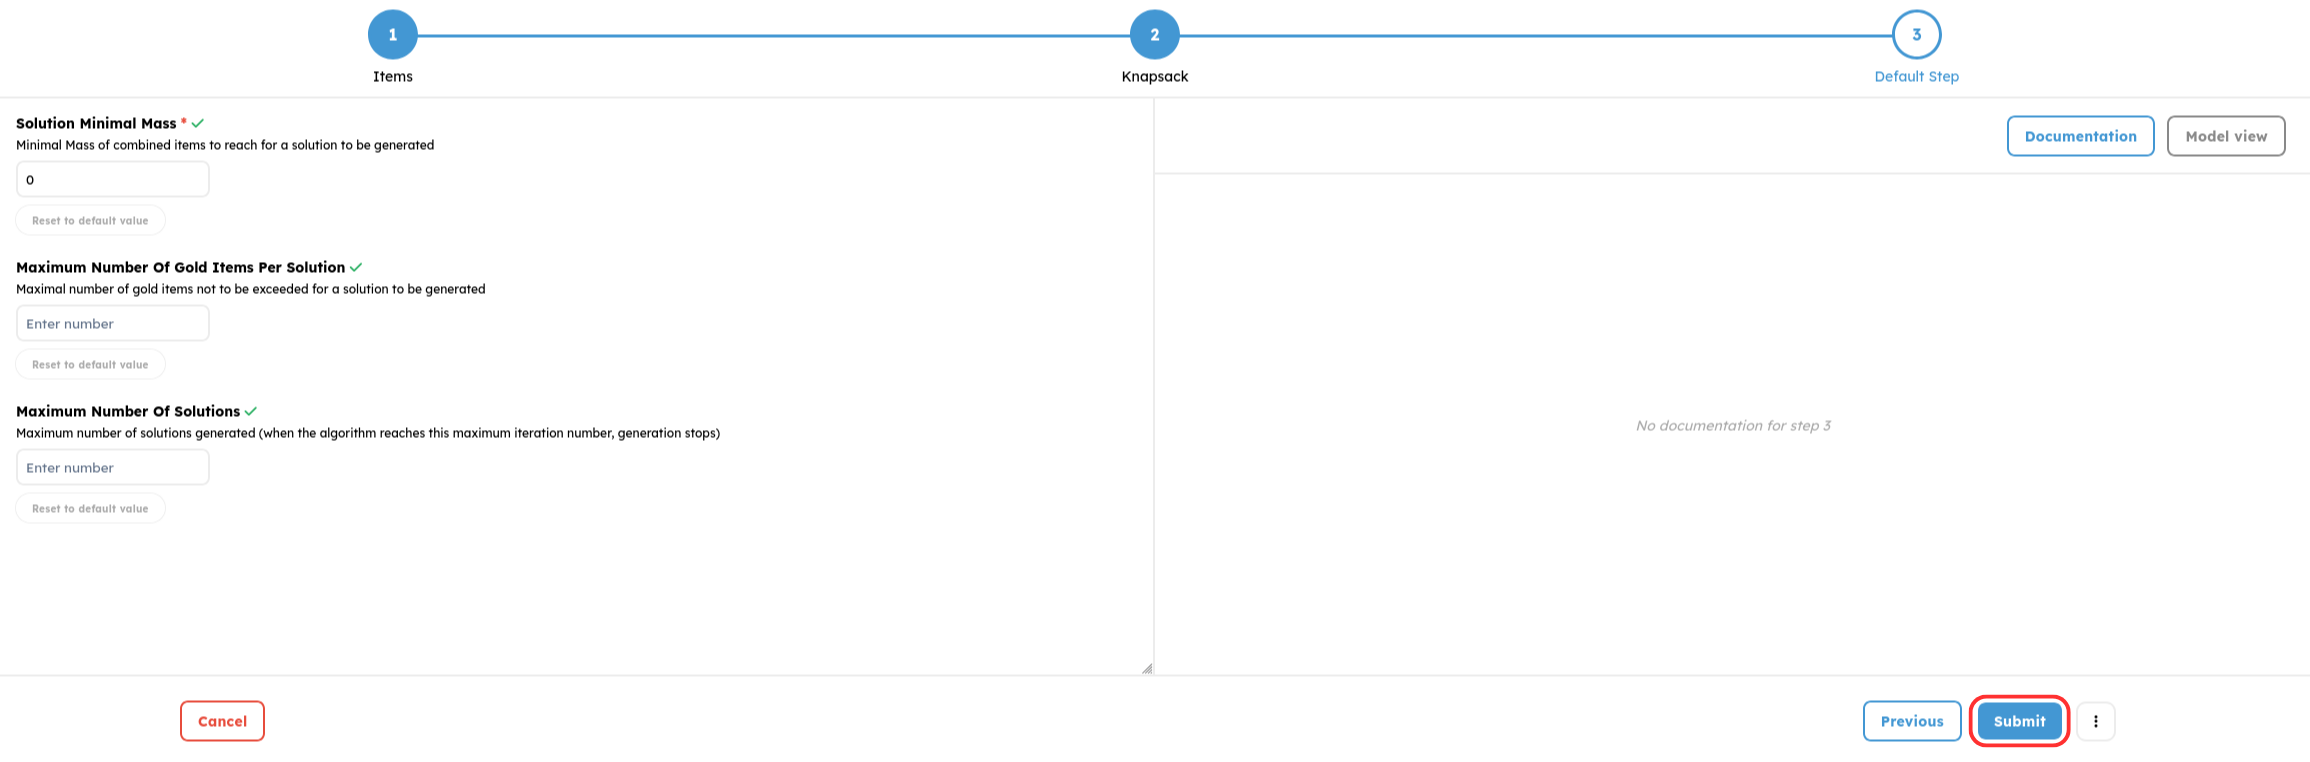
You can show the setup display by clicking Model view
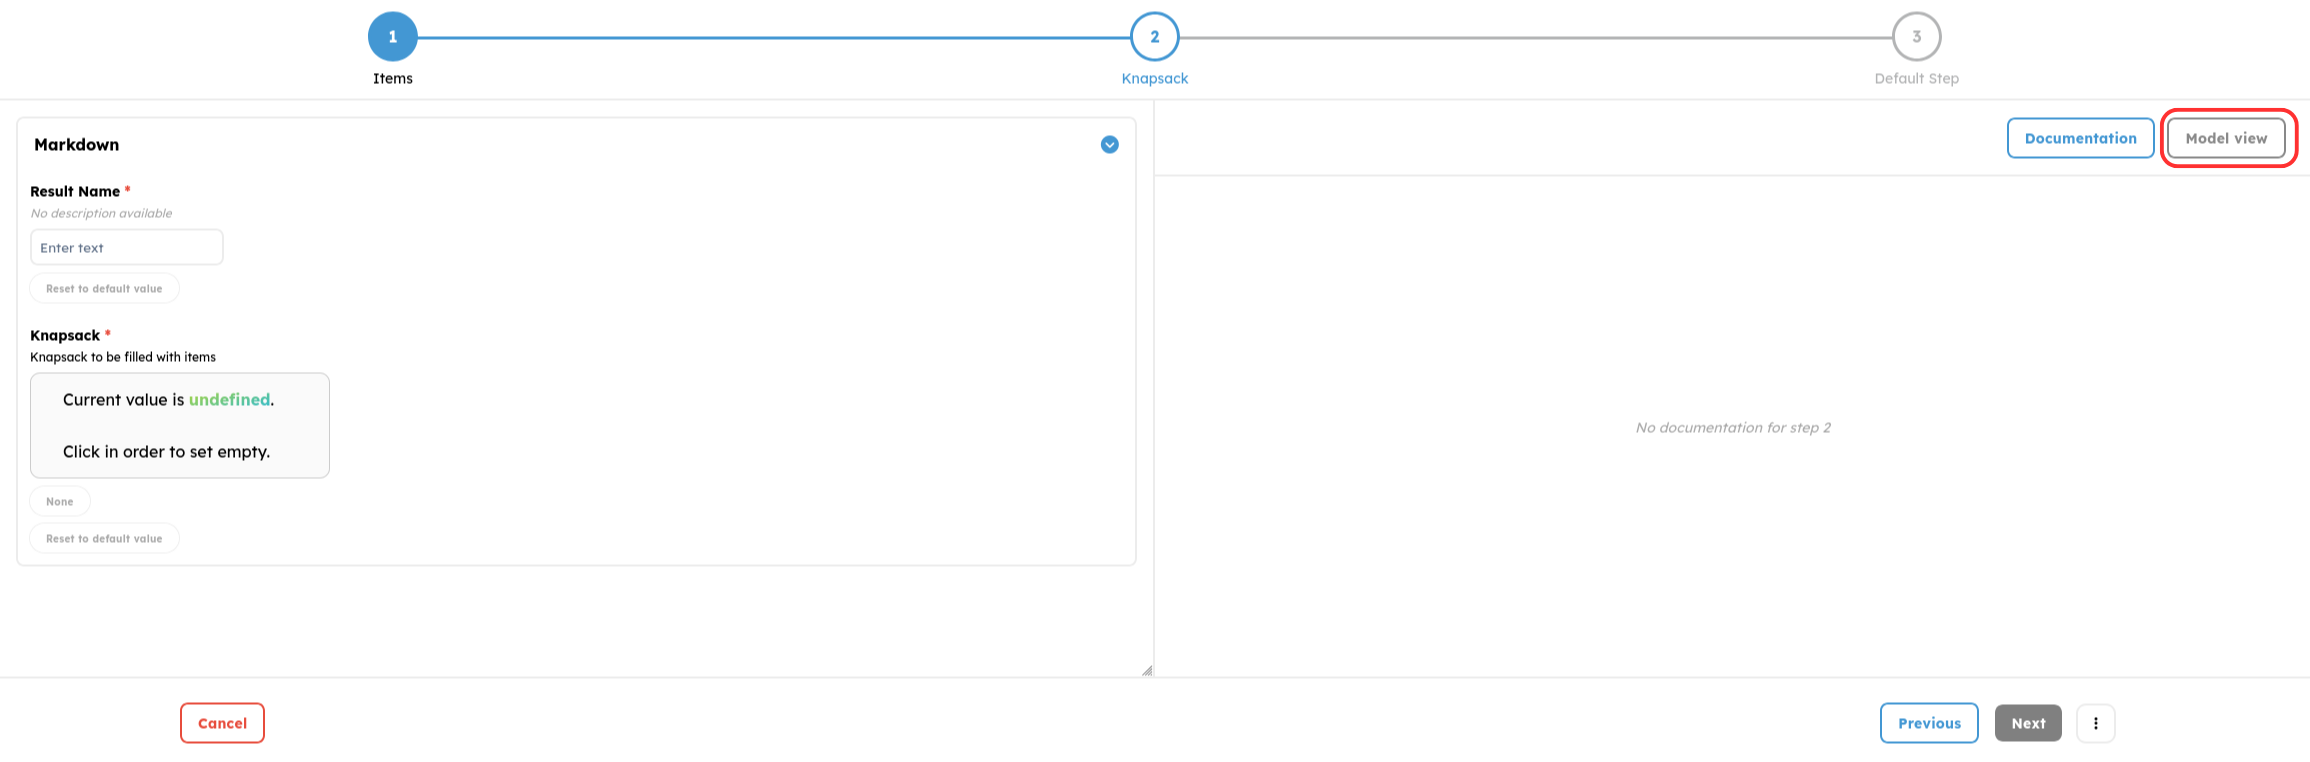
Fill in all the necessary input and refresh the view.
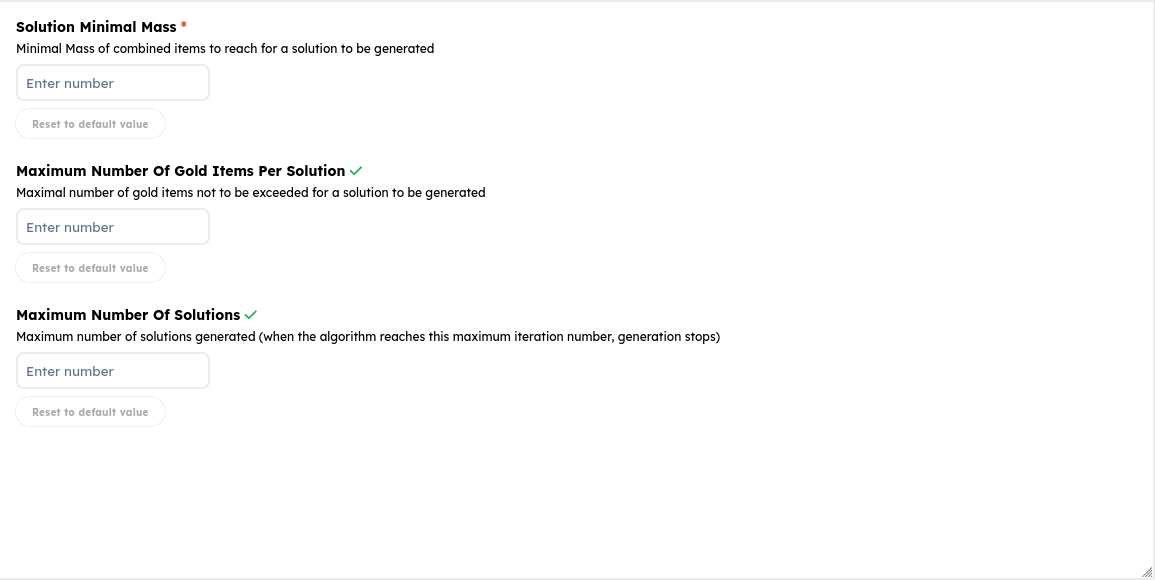
By entering the last step you will be required to enter the following inputs :
- Specify a minimum mass that filters out all solutions generated that don't meet this requirement in the final knapsack.
- The maximum number of gold items in a solution.
- The maximum number of iterations.
The two last inputs are optionnal because the workflow creator chose to define values for them. In such cases, their value will already be set in the field.
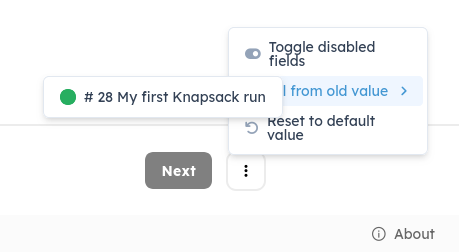
d. Fill in the form with values from last runs
In specific cases, if a previous calculation has produced results or not, it can be useful to load the previous input values that generated those outcomes. An option is available on the top right-hand side of the window to load these inputs. The user can then relaunch the calculation, modify the data before doing so, or even reset the entire form with the subsequent button if a mistake has been made.
e. Documentation
If required, documentation is available for each parameter when the workflow developer has filled in the specific class or method docstrings. These can help the user select the correct value, type, or unit or even understand the meaning of a parameter notation before filling in the input value. These descriptions are found between the input name and the field if they are set.
Alternatively, the workflow developer could have set a step documentation to help you fill in the fields. This is found on the right section of the form by clicking the Documentation button

3. Run and track your workflow
a. Run your workflow
When your form is complete, launch your workflow by clicking the Submit button on the bottom right-hand side of the window.
b. Track your workflow
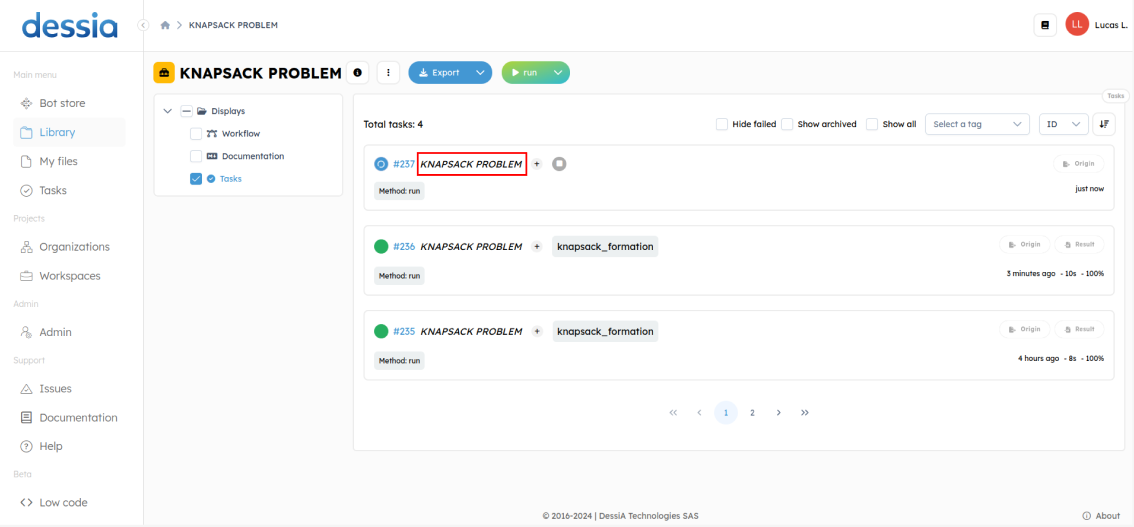
Once the workflow has successfully submitted the input values and is running, you can track its progress on the task page associated to the workflow that opens automatically.
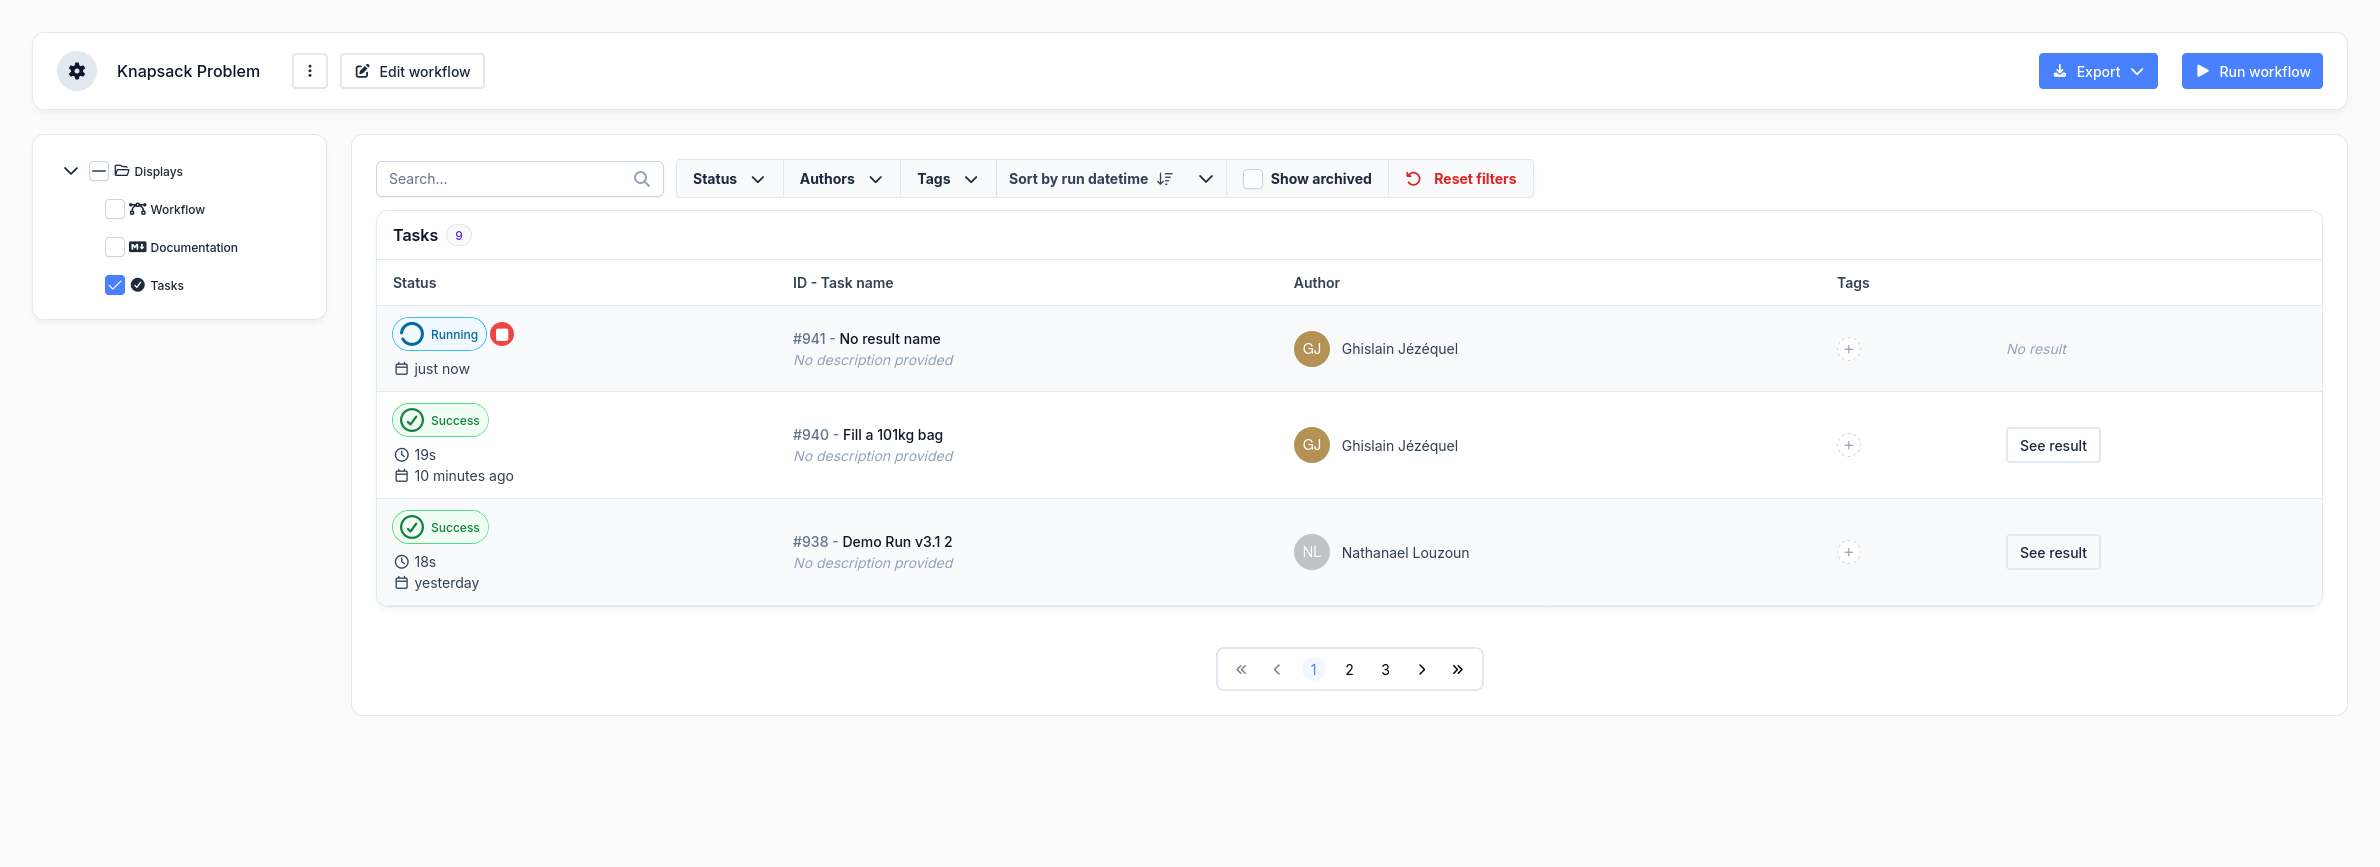
For more informations, click the task you launched.
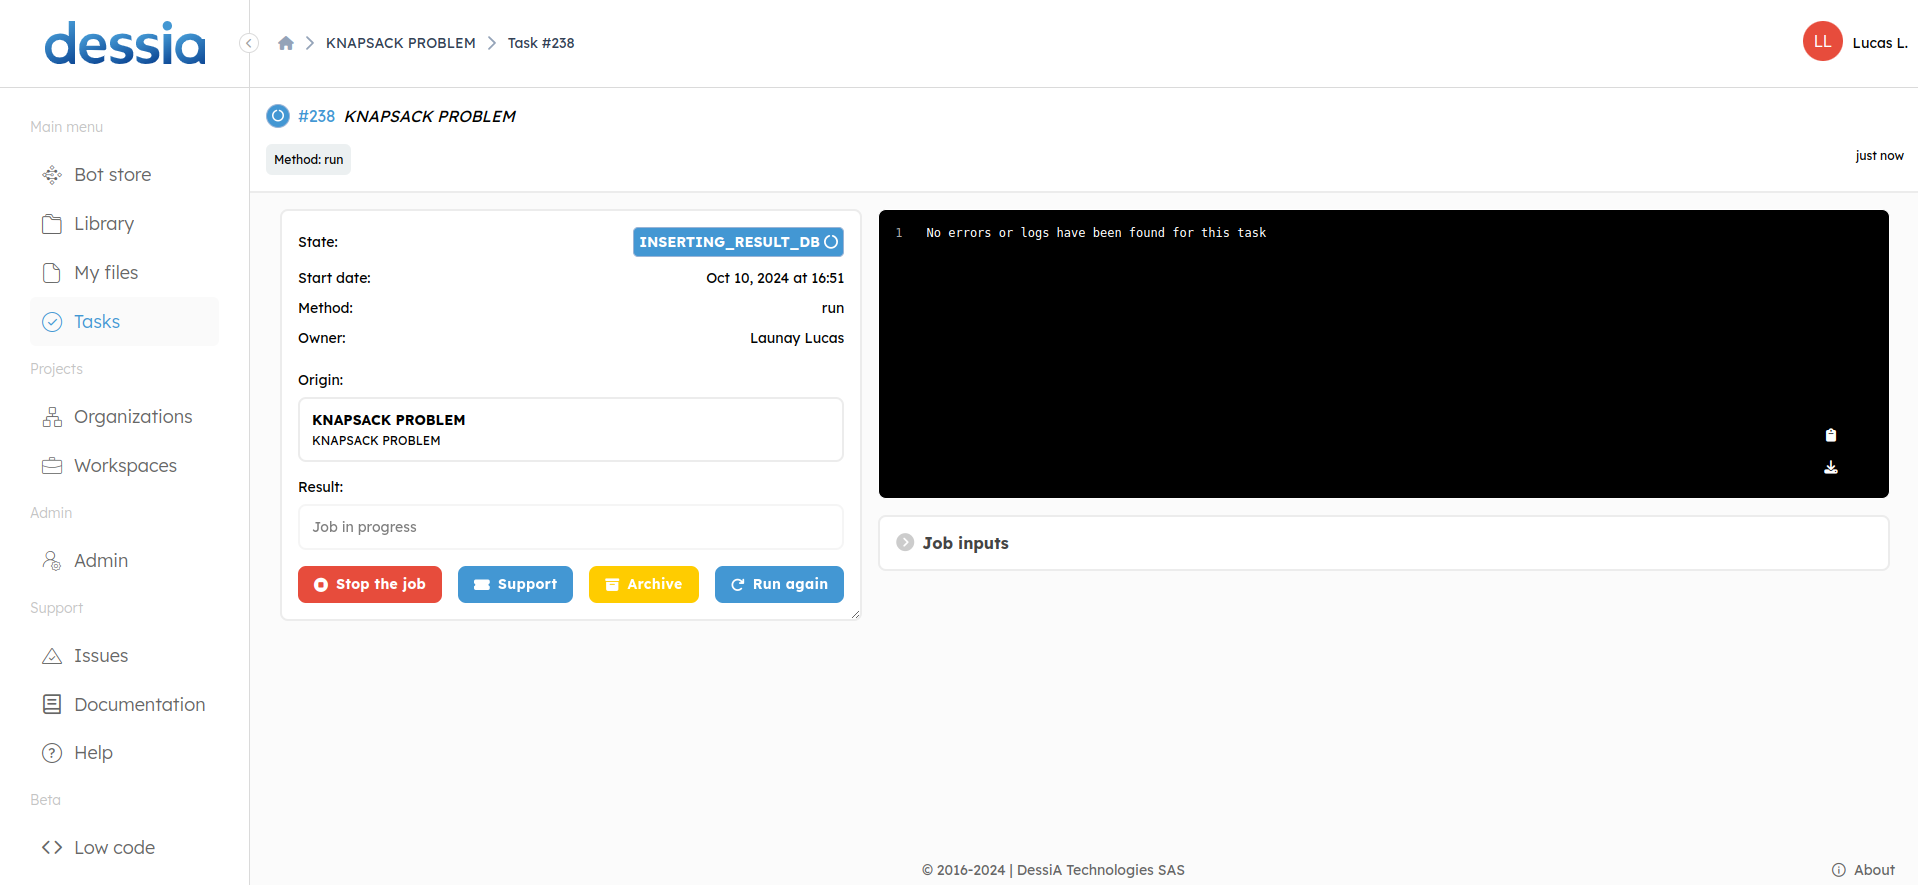
Several phases may appear during the calculation:
- Pending: task is in queue and waiting for another calculation to finish.
- Running: task is underway.
- Saving: Objects are being stored into the database so that any worksapce user can explore the results and work with them later.
- Success: task has finished without any errors.
- Failure: task has been blocked by an error during Running or Saving phase. Errors resulting from code failure or wrong input data are shown within the failed task, whereas platform issues are shown in the Admin - Systems Logs panel.
- Revoked: task has been cancelled by the user.
- Lost: task has been stopped due to a platform restart and data have been lost.
Different pieces of information are also available to the user on the interface:
- The workflow current state among those presented above.
- Date and time at which the workflow was launched and finished.
- Workflow duration, which includes the pending, computing, and inserting_in_db phases and the details of specific workflow phases (insertion in database and computing only).
- The workflow owner which corresponds to the person who launched the calculation.
- The origin object of the workflow, which redirects to the workflow object presentation page when clicked.
- The result object of the workflow, which redirects to the workflow run object presentation page (i.e., the page displaying the results) when clicked.
- When clicked, the support button redirects to a page on the platform that uses the current workflow as a reference to request a bug fix or a new feature.
- The Archive button lets you archive a task so that it no longer appears on the tasks page.
- The form button redirects to the form page, where the user can rerun the workflow with the same or different data.
- Information on the logs produced by the workflow. These logs correspond to messages intentionally developed to provide the user with information.
- If the option is expanded, provides a summary in developing mode of the input data given by the user (object inputs only have their reference in database identifier).
- Two pieces of information are provided on the time spent since the current workflow was launched: the total duration of calculations and insertion in the database, and the calculation process accomplishment percentage.
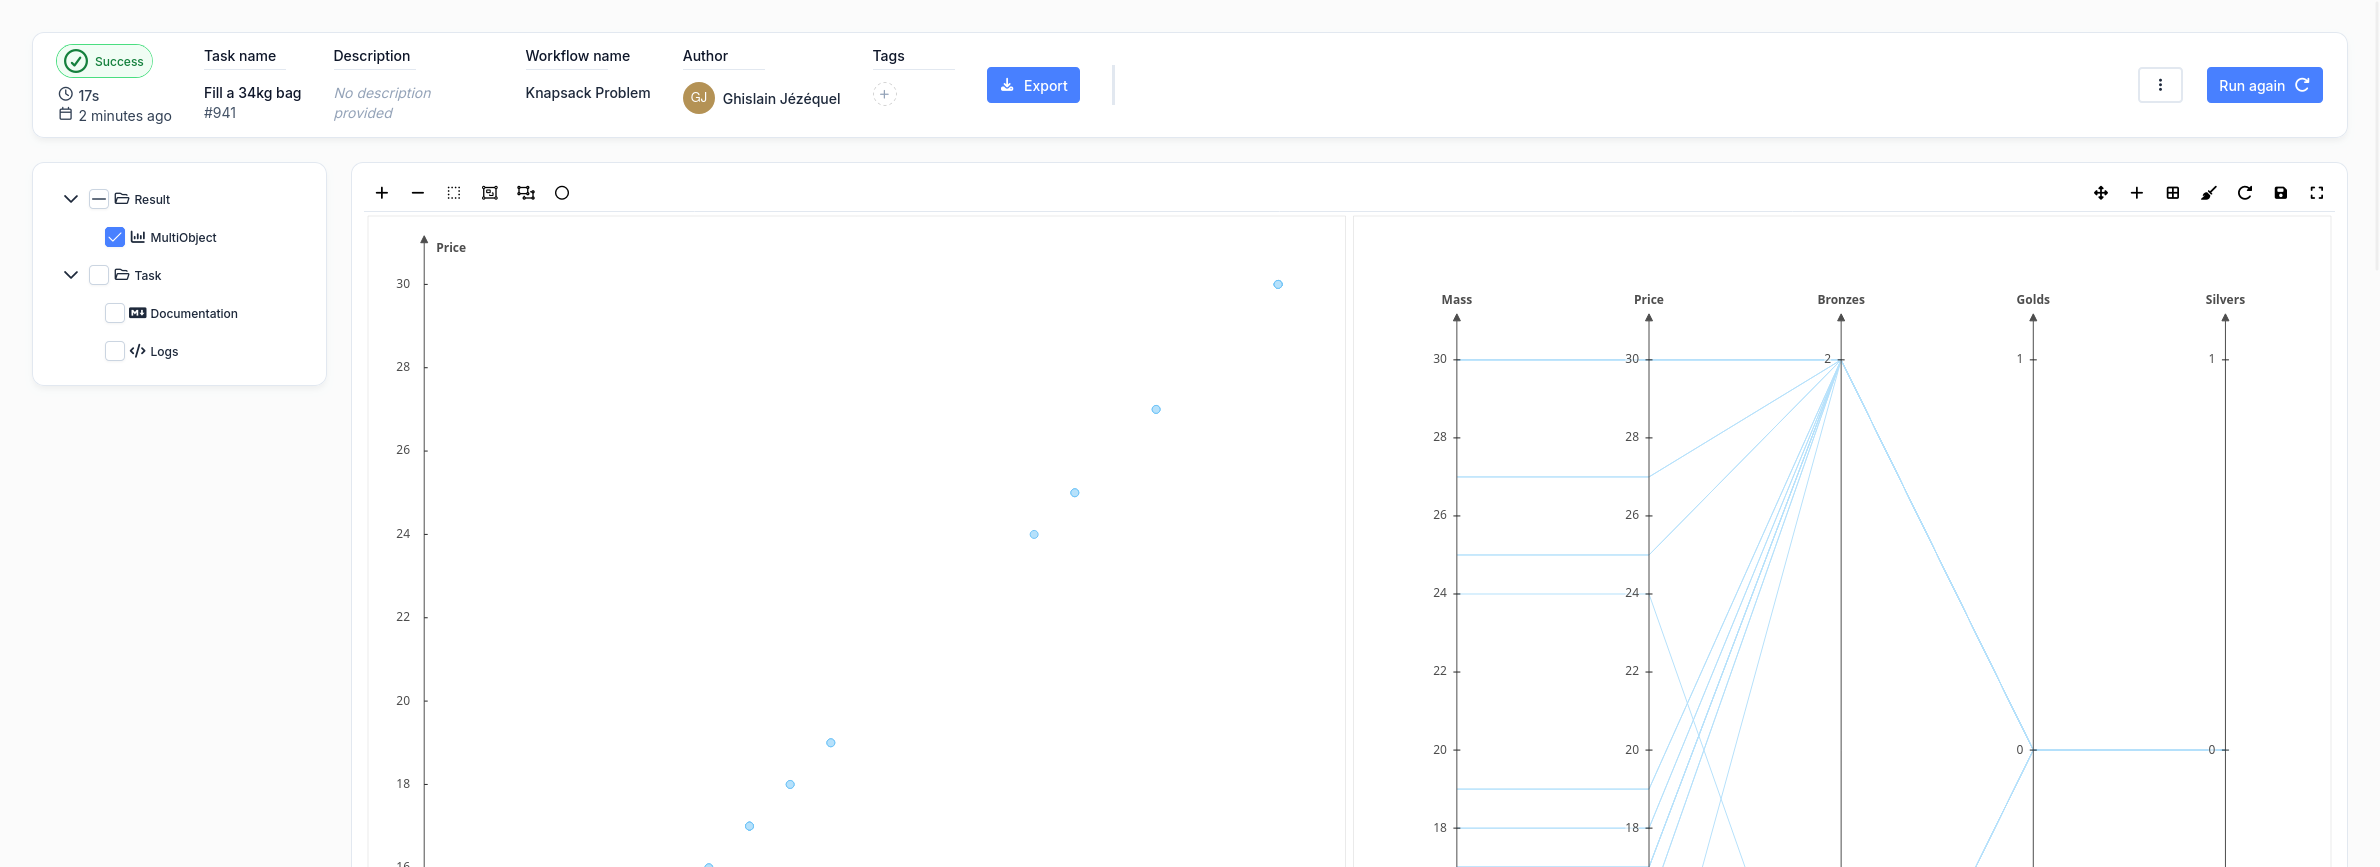
c. Explore your results
When a workflow has reached its Success state, the user can access its results page by clicking on the Results button.