On premise installation
For an on-premise installation you will need a server which can run docker and docker_compose. For windows servers, installation of docker_compose might be difficult see: https://docs.docker.com/compose/install/ (opens in a new tab) .
Container engine: docker or podman
Our platform is shipped as a software container depending on other services that you can specificaly deploy also by means of containers. On top of that an orchestrator (compose) takes the responsability
Two main technologies can be used to run the platform:
- Docker, a commercial tool that is free for small companies (under 250 employees)
- podman, an opensource alternative
We recommand to check the policy of your company about paying or not the docker licence.
If your choosing Podman you can skip the next Docker section directly to podman
Docker
- installing docker is rather simple, see their page to select the best option for you: https://docs.docker.com/engine/install/ (opens in a new tab)
There is a graphical tool, docker desktop, that is fun to discover the technology but it's limited and we cannot use it in the full process of deployment.
Troubleshoot problems for Windows
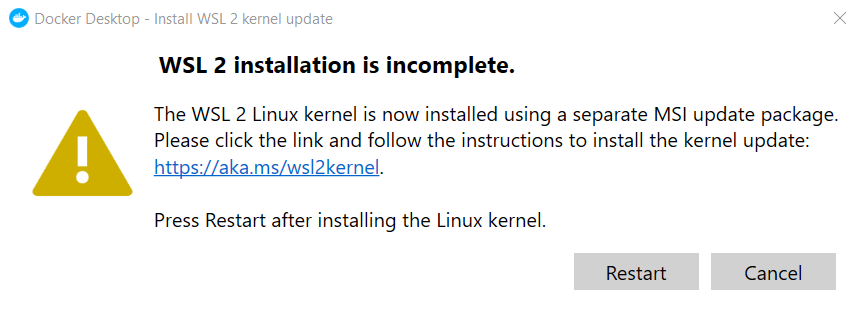
-
This message will perhaps appear. Click on the link, and install ARM64 package as proposed. After opening and installing WSL2, you must follow the next step if you want (mandatory?). Click restart on previous window opened.
-
Try tutorial when docker is opened. Go on the dashboard and you will see this :
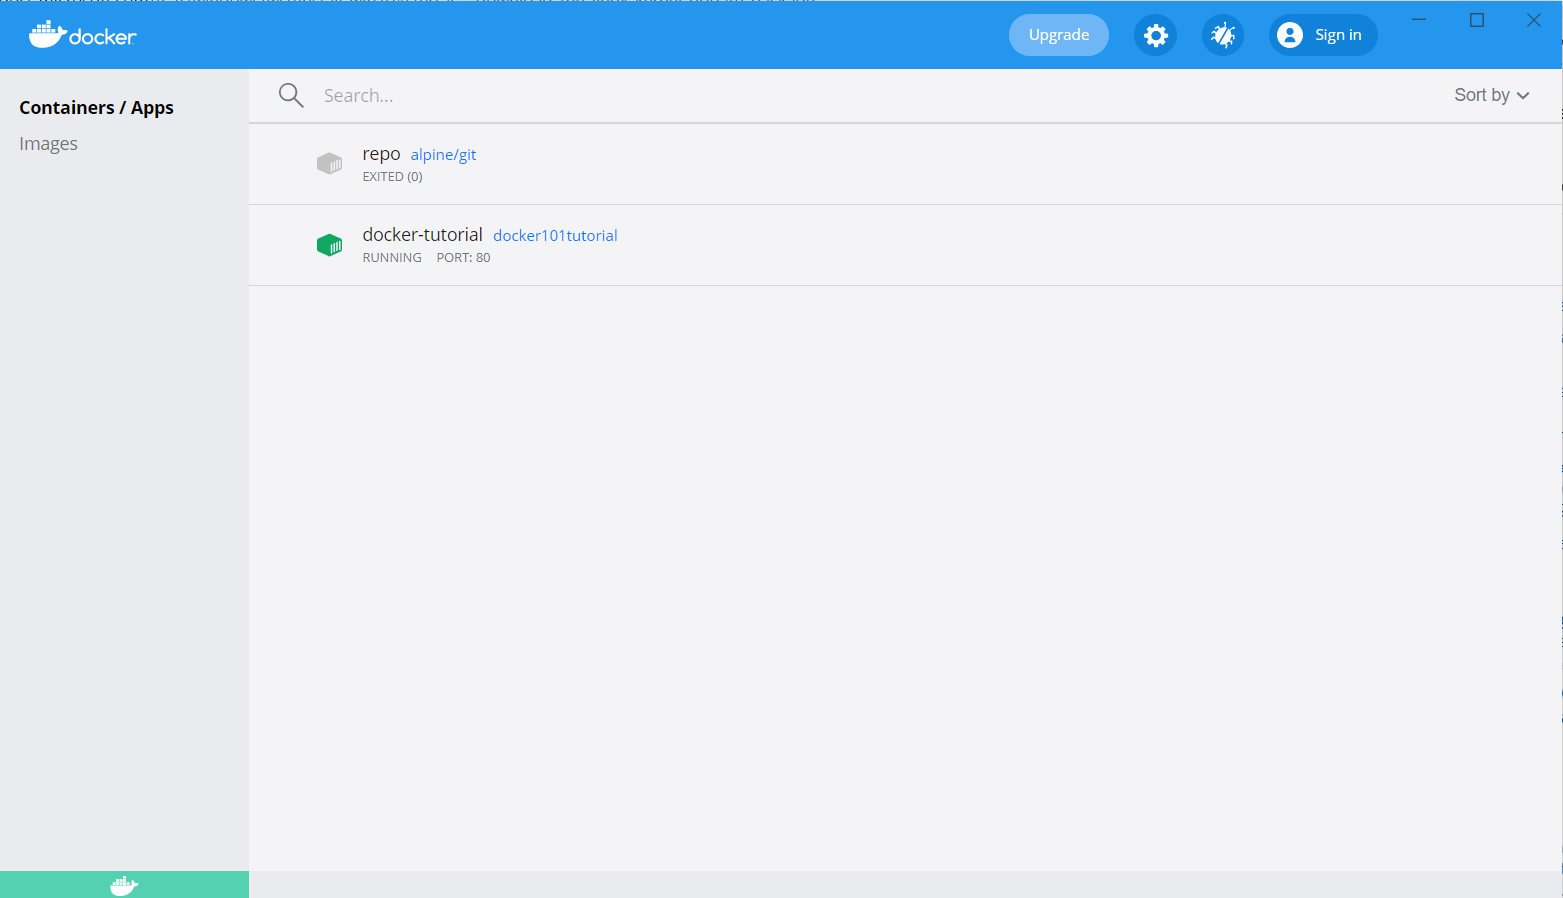
Podman
Podman itself is easy to install, see their install page: https://podman.io/getting-started/installation (opens in a new tab)
Then you will need ppodman compose, that you can install with pip: https://github.com/containers/podman-compose (opens in a new tab)
If you cannot access to the network, you should download on another machine the needed wheel by doing pip download podman-compose (have a similar python/os machine)
Then you should init podman with:
podman machine init
podman machine start
Again, if you cannot access to internet you should get the image at https://github.com/containers/podman-wsl-fedora/releases/latest/download/rootfs.tar.xz (opens in a new tab) and then run:
podman machine init --image-path .\rootfs.tar.xz
podman machine start
You can follow the next instructions by replacing the docker command by podman and docker-compose by podman-compose.
Enjoy the freedom of not having the docker licence!
Loading docker images
DessIA will give you to deploy:
- docker images that you must transfer to your server and load with docker load (opens in a new tab) command
- A docker compose file (docker-compose.yml) that you can customize (ports,disabling services, versions, choosing passwords and users)
DessIA will give you access to .tar files that are archives of images. You have to change directory to folder where files are (cd Downloads to go to Downloads directory).
Open Windows Command Prompt. To load a backend.tar file for example:
docker load -i backend.tar- It is possible that backend.tar does not work and you just have to write the name : backend
Do the same with frontend file.
docker load -i frontend.tar- It is possible that frontend.tar does not work and you just have to write the name : frontend
Check images are loaded with:
docker image ls
- In Windows version you will see less elements but backend and frontend have to be mentioned.
Frontend deployment
The example is given with a deployment on port 8000 (you can change this value)

- You must precise the tag of your file
docker run -d --restart=always --name=frontend -p 8000:80 dessia-platform-frontend:localhost_5000You can do this task with Docker Desktop :
-
Go on images
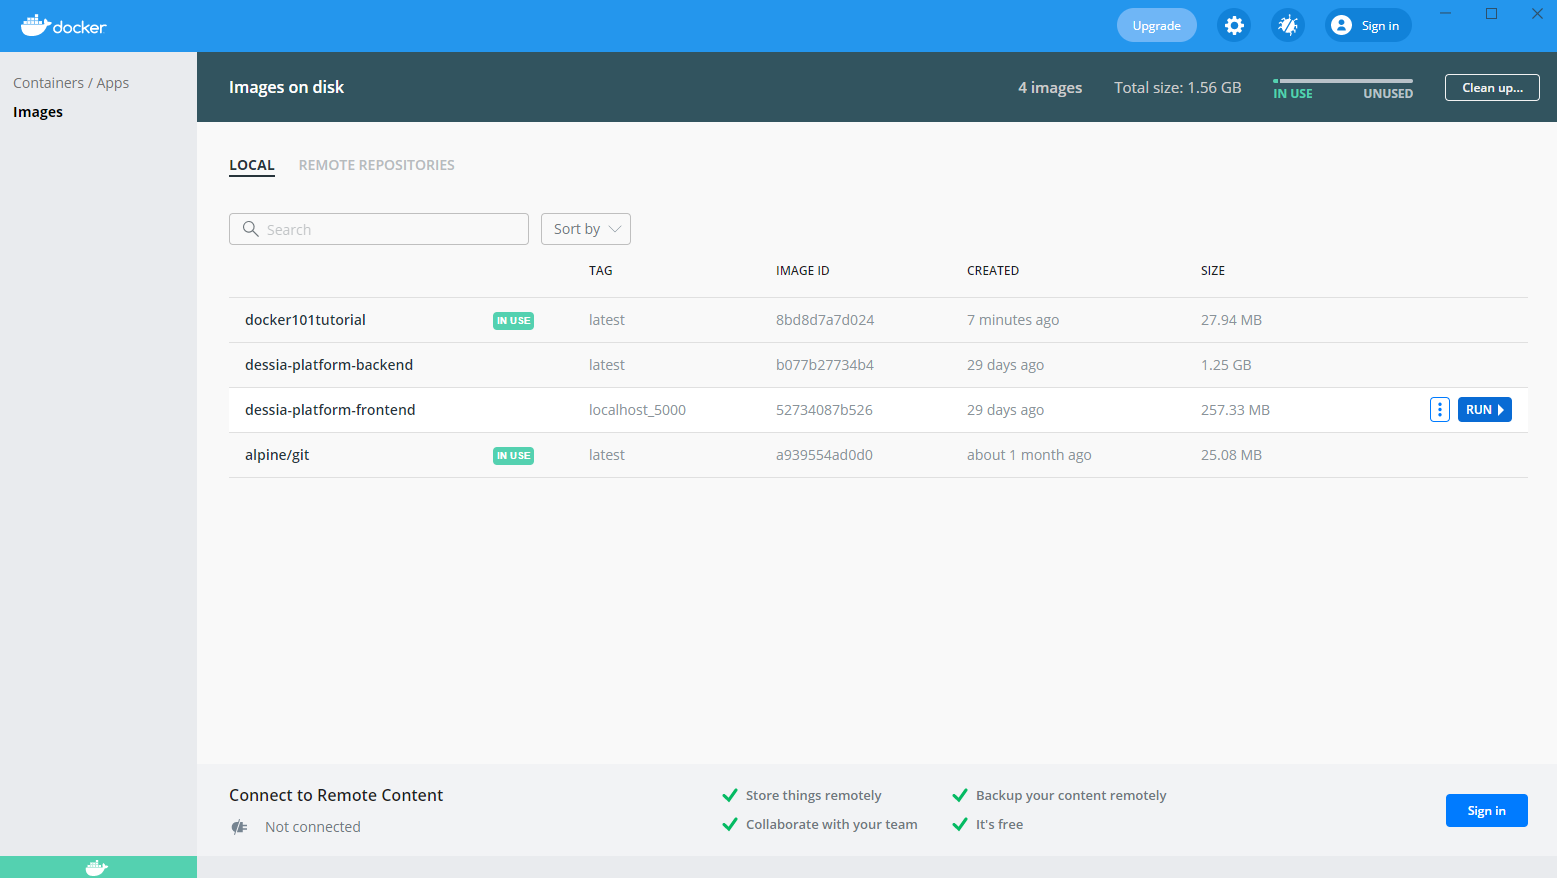
-
Click Run and fill blank as shown below
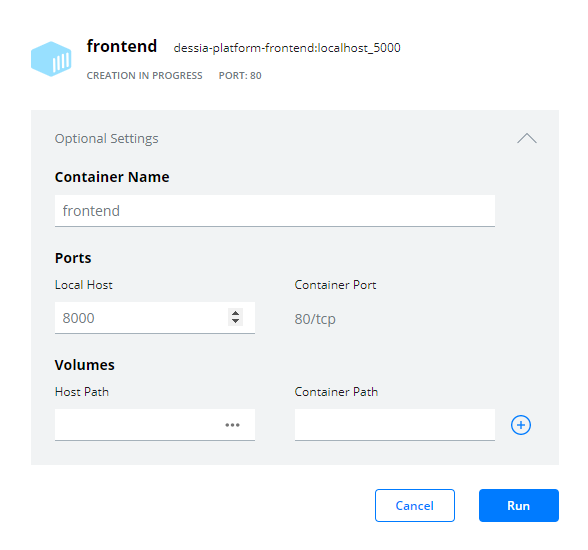
On-premise without connection
If you do not have access to internet, you should install an image in order to use our packages in your platform. These elements are present in a pypiserver.tar file. You have to change directory to folder where files are (cd Downloads to go to Downloads directory).
You perhaps have to stop frontend in your Docker Desktop --> Containers/Apps.
Open Windows Command Prompt. To load a pypiserver.tar file for example:
docker load -i pypiserver.tarYou have to load two others images :
docker load -i mariadb.tardocker load -i mongo.tarBackend deployment
You can create a folder in your personal folder where you will put the docker-compose.yml file and then in Windows command prompt change directory (cd .. = going back on the folder).
Run docker-compose
Then, type and run the following command :
docker-compose up -d- docker-compose has to be the name of the file.yml.
If you have install pypiserver.tar, you have to place pypi-packages folder elements in another folder.
Windows Users
Firstly, you have to stop frontend and docker-compose tree (Folder's Name where docker-compose is located).
Open file explorer and copy/paste the following element in you search section :
\\wsl$\docker-desktop-data\version-pack-data\community\docker\
Then, click on arrow to go to this directory. Go to :
- Volumes > Folder's Name where docker-compose is located_pypi-packages > _data and here you have to paste all elements in pypi-packages.
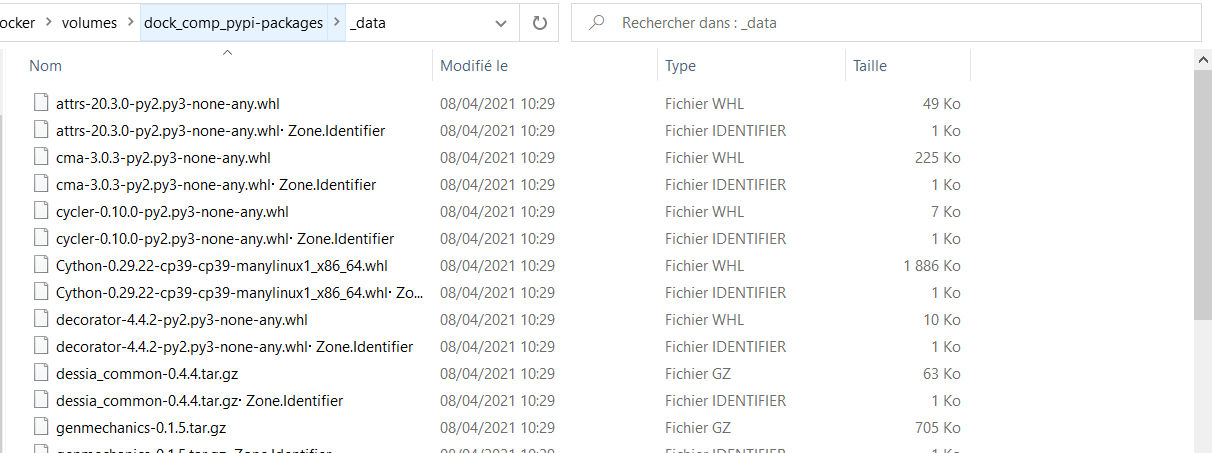
- Remarks : It is possible that you will find nothing. In this case, try to run docker-compose as explained upper. After this operation, retry to put pypi-packages elements.
Linux Users
You have to process the same actions as windows but in your /var/lib folder.
Open/Update/Load
If nothing is running in your docker, please Run docker-compose (Folder's Name where docker-compose is located) and frontend.
Open your platform in your browser
You can have a platform available in your personal server by opening it thanks to Docker Desktop with 'Open in browser' or by typing 'localhost:8000' in your URL browser.
Update your frontend
If you have to change or update your frontend file, you can follow the procedure :
- Download the newfrontend.tar file that will replace your actual frontend.
- Open your command prompt and change directory to the position of the new file downloaded.
- Once in the right directory, you have to type the following command :
docker load -i newfrontend.tar-
It is possible that newfrontend.tar does not work and you just have to write the name : newfrontend
-
If you have Docker Desktop, you should open it, remove frontend from Containers/Apps and remove ancient frontend on Images.
-
You have to Run the new frontend by filling information as explained upper.
-
Before using your new platform, you have to clear cache options. (In google chrome, you have to go to parameter, clear browsing data).
Update your backend
If you have to change or update your backend file, you can follow the procedure :
- Stop your docker compose (the element that creates a tree when clicking on it) and frontend if necessary on Containers/Apps.
- Open your command prompt and change directory to the position of the new file downloaded.
- Once in the right directory, you have to type the following command :
docker load -i newbackend.tar- It is possible that newbackend.tar does not work and you just have to write the name : newbackend
If you have Docker Desktop, you should open it, remove docker compose from Containers/Apps and ancient backend from Images (backend ancient name could be <none>).
- You have to Deploy Backend with the docker compose. Go to the folder where docker compose.yml is. You can run it in Containers/Apps of Docker Desktop too.
docker-compose up -d-
Start frontend on Containers/Apps.
-
Before using your new platform, you have to clear cache options. (In google chrome, you have to go to parameter, clear browsing data).
-
You can remark that there are others backend unused in your Images. You can remove them.
Update your docker-compose.yml
If you have to change or update your docker compose file, you can follow the procedure :
- Stop your docker compose (the element that creates a tree when clicking on it) and frontend if necessary on Containers/Apps. Furthermore, you have to delete this docker compose.
- Open your command prompt and change directory to the position of the new docker compose. You have to replace it in the same folder as before by deleting the ancient.
- Once in the right directory, you have to type the following command :
docker-compose up -d- docker-compose has to be the name of the file.yml.
Load and update packages in your platform
As explained in Get Started/Upload Your Bot, you need .whl files. If you have them, load them in your platform : Admin/Applications/Create App. Don't forget to click on the new package, activate it by giving a version and state. Restart platform : Admin/Actions/Restart platform.
- If you want to update this package, you have to do same and a new version will be available.
Packages will be in blue color if they are well installed. If they are orange, please check below :
Without internet connection :
Go on Admin/Logs and click on the last logs available. If "setuptools_scm" is mentioned at the end, you have to :
- Open Docker Desktop, go on Containers/Apps and click on the tree container. You probably see the backend. You have to click on backend CLI, it should open a window.
- Once in the window, type : pip3 install setuptools_scm --index-url ‘http://pypi:8080/simple’ (opens in a new tab) --trusted-host pypi
- Then, restart platform and workers in Admin/Actions.
Load objects in your platform
Requirement : Anaconda or other IDE. Please check Get Started/Installation/Install Python.
Without internet connection
If you do not have access to internet, you have to load packages from pypiserver. Thanks to Anaconda prompt powershell :
pip3 install MODULE_NEEDED --index-url 'http://localhost:8080/simple' --trusted-host localhost- If you need dessia_api_client you must replace MODULE_NEEDED by dessia_api_client
Load .json file
On the platform you can create an object out of a JSON file.
Alternatively, you can do it in python:
from dessia_api_client import Client
c = Client(api_url='http://localhost:5000')

import json
with open('path\\to\\file\\file.json', 'r') as file:
    d = json.load(file)
c.create_object_from_object_dict(d)
Load DessiaObject
from dessia_common import DessiaObject
from dessia_api_client import Client

dict_ = Your_Object_To_Load #For example a Catalog, a Workflow, but import specific module

c = Client(api_url='http://localhost:5000')
r = c.create_object_from_python_object(dict_)
Tips and use
- API error : wait or close your platform (frontend + docker-compose), and restart it
- Login error : Sometimes you are to quick, wait 5-10 seconds before logging
- Refresh page or restart platform if you have any trouble
- Clear cache could be the solution sometimes