Git Graph
Introduction
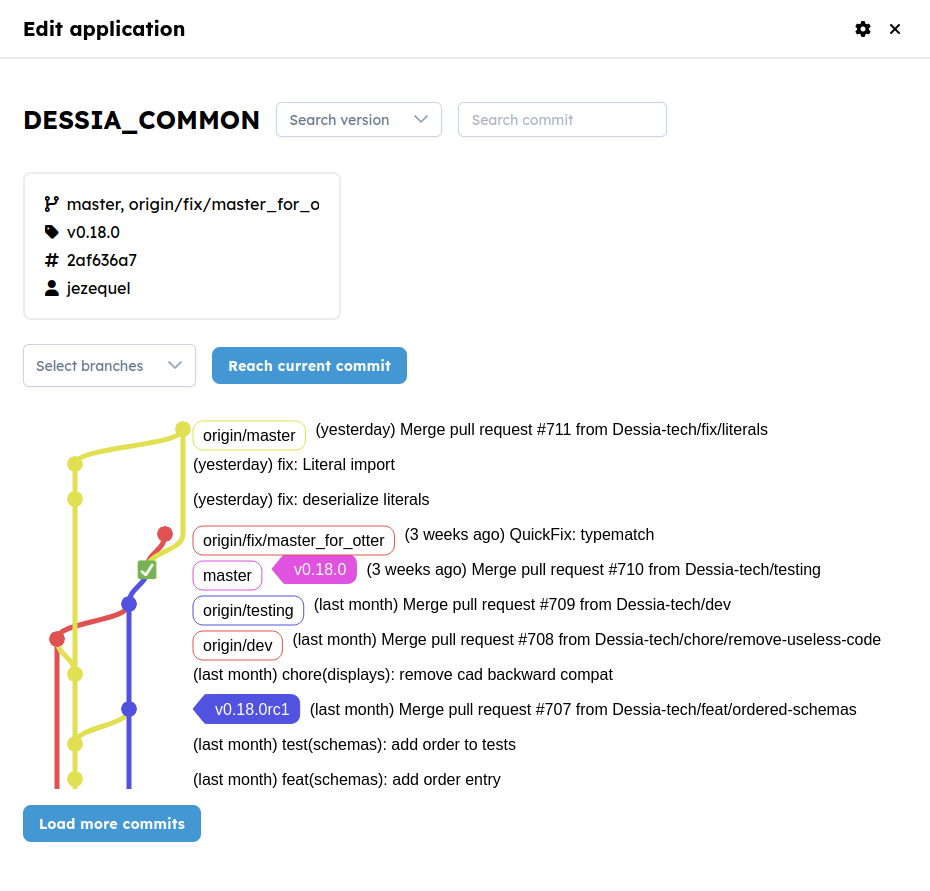
To specify the version of a git package we use a git graph

Let's dive deeper inside all it's functionalities
Presentation

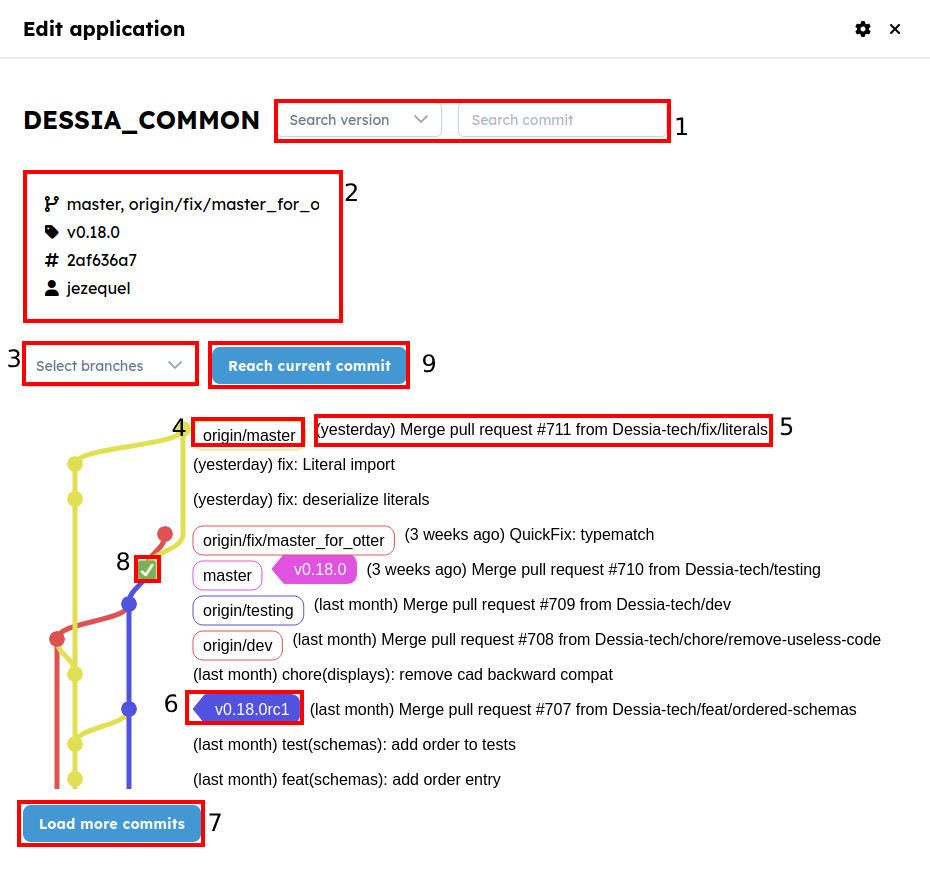
- Searching Area: Here you can enter a specified commit or select a existing version of your package. (Very old commit or version can cause a bit of lag as it have to load a lots of commit)
- Commit detail : Here you can see branches link to this commit and the committer
- Branche selection: You can select one or more branches, that would be helpful if you repository contains a lot of branch and you want to navigate only one a specific part of it
- Branch : This shows you what is the head on this commit
- Commit message: You can see how old it is and the commit message
- Tags : There you can see tags
- More commit: This will add 50 commit to the graph
- Current Commit: This shows the current version of the repository
- Reach button: If you current version is very old and you wanna see neighborhood of the current version you can simply click on this button
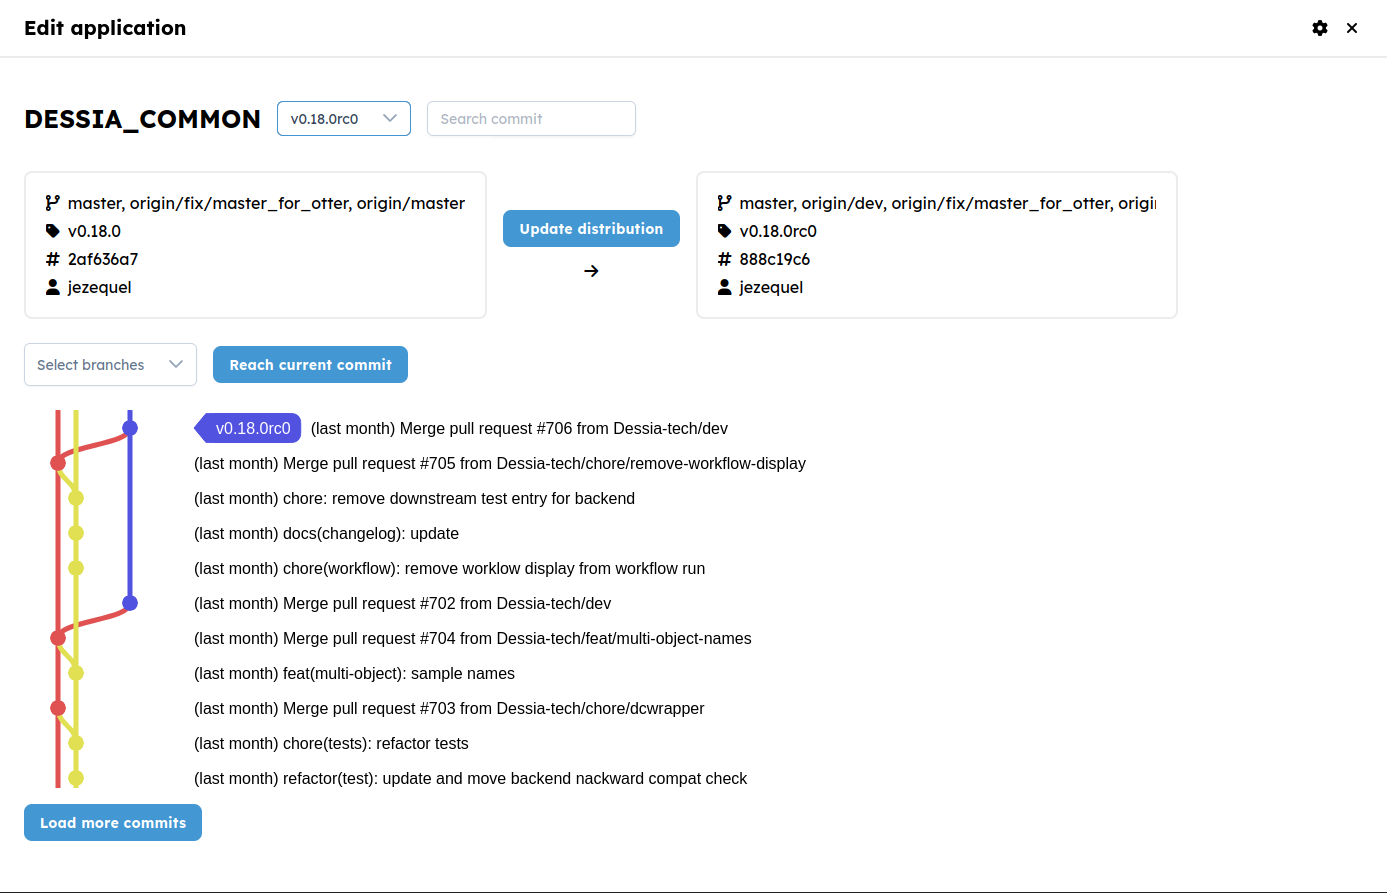
Now that we know how to find the right version, we can click on the commit point

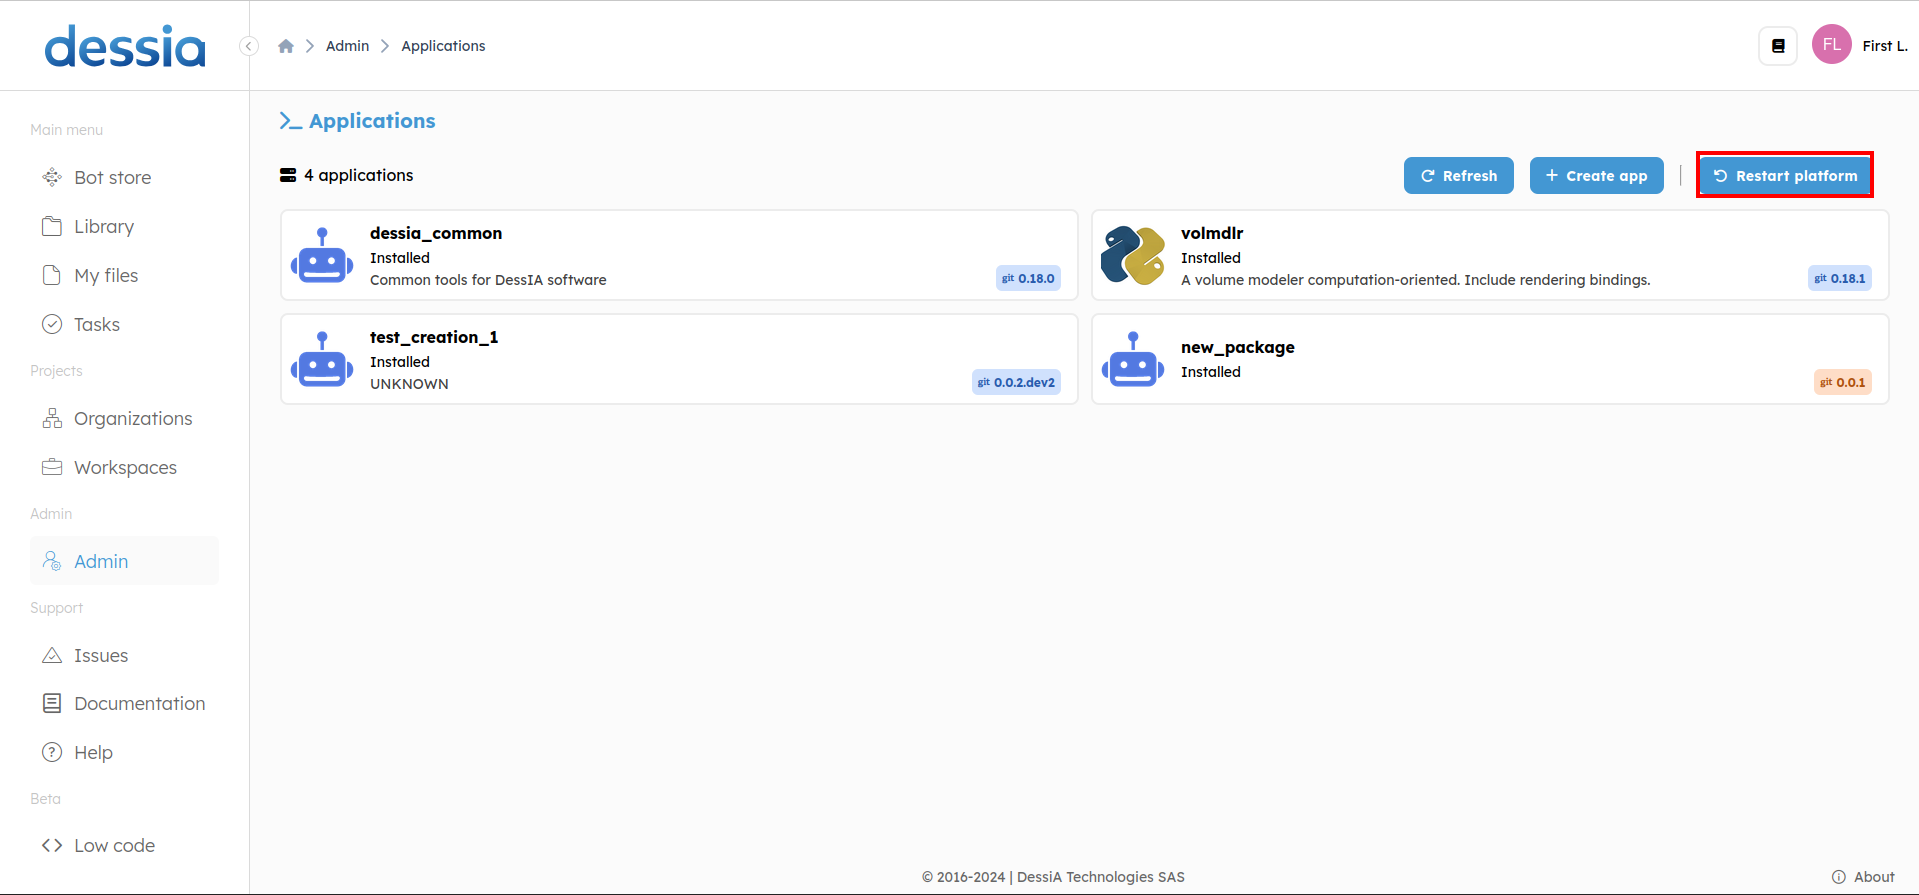
We now need to update distribution and that will update the version of our package. Then restart the platform to apply changes.
